Jim lawrence flush lights fitting guide how to fit a ceiling light ultimate handyman diy tips mounting fixtures fine homebuilding replace install fixture the art of manliness fan with pendant change living by homeserve modern home repair tutor your in seven easy steps pinch joy

Jim Lawrence Flush Lights Fitting Guide

How To Fit A Ceiling Light Ultimate Handyman Diy Tips

Mounting Light Fixtures Fine Homebuilding

How To Replace Install A Light Fixture The Art Of Manliness

How To Replace A Ceiling Fan With Pendant Light

How To Change A Light Fitting Living By Homeserve

How To Replace Install A Light Fixture The Art Of Manliness

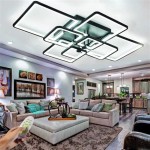
Modern Ceiling Lights How To Install By Home Repair Tutor

How To Change Your Light Fixture In Seven Easy Steps A Pinch Of Joy

How To Replace A Ceiling Fan With Pendant Light

How To Replace A Ceiling Light Home

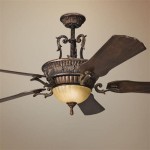
How To Install A Vintage Ceiling Light Fixture Simple Decorating Tips

How To Install Ceiling Light Fixtures Ehow

Part 2 Replace Pendant Light Fitting With One That Doesn T Need A Ceiling Rose

How To Change Your Light Fixture In Seven Easy Steps 2023 Installing Diy Fixtures Home Repair

How To Install Ceiling Light Homeserve Usa

How To Install A Ceiling Light Fixture Diy Family Handyman

How To Change A Light Fixture

How To Swap An Old Ceiling Rose With A Modern Light Fixture Plumbing Electric Wonderhowto
Jim lawrence flush lights fitting guide how to fit a ceiling light ultimate mounting fixtures fine homebuilding replace install fixture fan with pendant change living modern your in home