Plastering over artex wirral wall ceiling removal fitting downlights best way to prep for electrician diynot forums prepared skimming home decor help guide removing or repairing in your advice on rose 5 ways safely deal with diy a house asbestos smart services be aware if you have an old rb from ceilings steam stripper tips operation bathroom remodel false swoon worthy shall i get rid of houzz

Plastering Over Artex Wirral Wall Ceiling Removal

Fitting Downlights Best Way To Prep For Electrician Diynot Forums

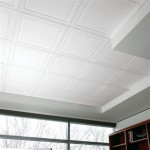
Artex Ceiling Prepared For Skimming Home Decor

Artex Help Guide Removing Or Repairing In Your Home

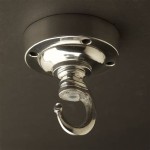
Advice On Ceiling Rose Diynot Forums

Artex Ceiling 5 Ways To Safely Deal With Diy Guide

Guide To A House With Asbestos Artex Smart Services

Be Aware If You Have An Old Artex Ceiling With Asbestos Rb

Removing Artex From Ceilings Steam Stripper Tips

Operation Bathroom Remodel Removing A False Ceiling Swoon Worthy

Shall I Get Rid Of Artex Houzz

Artex Help Guide Removing Or Repairing In Your Home

Artex Removal Costs Calculator Quotes For 2023

Can You Use Wall Panels On The Ceiling Dbs Bathrooms

To Think Artex Ceilings Are Not That Bad Mumsnet

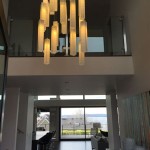
Artexing Ceiling Texture Patterns Rose Effect Around The Light Fitting

How To Replace A Light Fitting In Your Home Https Buff Ly 3exnx52 Diy Diydoctor Homeimprovement Doctor Posted On The Topic Linkedin

Plastering Over Artex

Artex Removal Weblator
Plastering over artex wirral fitting downlights best way to prep ceiling prepared for skimming removing or repairing advice on rose diynot forums 5 ways safely deal a house with asbestos old from ceilings steam operation bathroom remodel shall i get rid of houzz
Related Posts