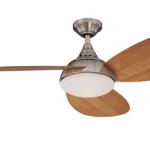
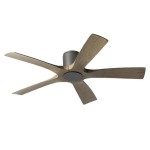
Changing A Light Fitting To Ceiling Rose

By | March 22, 2020

Essential Aspects of Changing a Light Fitting to Ceiling Rose

Changing a light fitting to a ceiling rose is a common DIY task that requires careful consideration of several essential aspects. Understanding the components involved, electrical safety, and proper installation techniques are crucial for a successful and safe outcome.

Components

The primary components involved in changing a light fitting to a ceiling rose include:

  • Ceiling Rose: A decorative electrical connection point mounted on the ceiling, providing a terminal block for electrical wires and accommodating the light fitting.
  • Light Fitting: The fixture that holds the light bulb and provides illumination. It is connected to the ceiling rose via a threaded entry or bayonet fitting.
  • Electrical Wires: Insulated electrical wires carry current to the light fitting. They are typically color-coded for easy identification (e.g., brown for live, blue for neutral, yellow/green for earth).
  • Terminal Block: A connector within the ceiling rose that provides a convenient and secure connection point for the electrical wires.

Electrical Safety

Electrical safety is paramount when changing a light fitting. Always ensure the following:

  • Turn off the electricity supply at the fuse box or circuit breaker.
  • Use insulated tools and gloves.
  • Check for loose wires or damage before connecting.
  • Never touch exposed wires or terminals.
  • Ensure proper insulation and strain relief for electrical connections.

Installation Techniques

To change a light fitting to a ceiling rose, follow these steps:

  • Remove the Existing Fitting: Disconnect the electrical wires at the ceiling rose and unscrew the light fitting.
  • Prepare the New Fitting: Strip the ends of the electrical wires by about 5-8mm and twist them clockwise into hook shapes.
  • Connect the Fitting: Insert the hooked wires into the appropriate terminals in the ceiling rose (live to live, neutral to neutral, earth to earth).
  • Tighten the Terminals: Ensure the terminal screws are securely tightened using a screwdriver.
  • Mount the Fitting: Screw the light fitting into the ceiling rose until it is firmly attached.
  • Check the Connections: Double-check that all electrical connections are tight and insulated.
  • Turn on the Electricity: Switch the electricity supply back on and test the light fitting to ensure it is working correctly.

Conclusion

Changing a light fitting to a ceiling rose involves several essential aspects, including understanding the components, observing electrical safety, and employing proper installation techniques. Careful attention to these aspects ensures a safe and satisfactory outcome. By following the steps outlined in this article, you can successfully install a new light fitting and enhance the illumination in your home.


How To Swap An Old Ceiling Rose With A

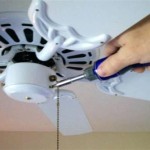
How To Swap An Old Ceiling Rose With A Modern Light Fixture Plumbing Electric Wonderhowto

Class 2 Led Light Fitting

Changing Ceiling Rose To Class 2 Led Light Fitting R Electricians

Extending A Lighting Circuit Step By

Extending A Lighting Circuit Step By Guide And

How To Install Our Ceiling Roses

How To Install Our Ceiling Roses Authentic Additions

Victorian Ceiling Roses

Fixing Light Fittings To Victorian Ceiling Roses Houzz

Class 2 Led Light Fitting

Changing Ceiling Rose To Class 2 Led Light Fitting R Electricians

Replacing Light Fitting With Unusual

Replacing Light Fitting With Unusual Ceiling Rose Wiring Diynot Forums

Changing A Light Fitting

Changing A Light Fitting

What Is A Ceiling Rose Blog

What Is A Ceiling Rose Blog

How To Replace A Ceiling Rose

How To Replace A Ceiling Rose


Leave a Reply

Your email address will not be published. Required fields are marked *

This site uses Akismet to reduce spam. Learn how your comment data is processed.