Bathroom spotlights reuter com ceiling lights a guide best lighting ideas and for you housing news minisun ip65 downlight in chrome value philips fixtures downlights dusk blog how to get the perfect spa darklight design supply

Bathroom Spotlights Reuter Com

Bathroom Ceiling Lights A Guide

Best Bathroom Lighting Ideas And Ceiling Lights For You Housing News

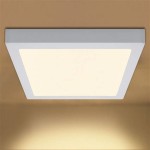
Minisun Bathroom Ip65 Downlight In Chrome Value Lights

Best Bathroom Lighting Ideas And Ceiling Lights For You Housing News

Bathroom Ceiling Lights A Guide

Bathroom Lighting Philips

Bathroom Lighting Fixtures Downlights Dusk Blog

Bathroom Ceiling Lights A Guide

How To Get The Perfect Spa Bathroom Lighting Darklight Design Supply

Bathroom Lighting Philips

Premium Quality Bathroom Lighting Downlights Direct

The Best Led Downlights For Bathrooms Simple Lighting

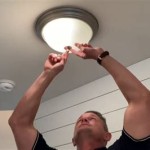
How To Change A Spotlight Bulb

The Best Bathroom Ceiling Lights In 2023 Lepro Blog

How To Change Downlights Or Recessed Lights In False Ceiling Electrician Singapore Recommended Services

Bathroom Ceiling Lights Downlights Direct

Changing A Bulb In Sealed Bathroom Downlight Diynot Forums

The Essential Guide To Bathroom Led Lighting Super Bright Leds

Tlw A Guide To Spacing Bathroom Spotlights
Bathroom spotlights reuter com ceiling lights a guide minisun ip65 downlight in lighting philips fixtures downlights spa
Related Posts