Convert Recessed Light to Ceiling Fan: A Step-by-Step Guide
Recessed lighting is a great way to add both style and function to your home, but it's not always the most practical choice for every room. If you're looking for a way to add more airflow and cooling to your space, converting a recessed light to a ceiling fan is a great option.
Here's a step-by-step guide to help you get started:
Step 1: Gather Your Materials
Before you start, you'll need to gather a few materials:
- A ceiling fan
- A recessed light housing
- A junction box
- Electrical wire
- Wire nuts
- A screwdriver
- A drill
Step 2: Remove the Recessed Light
Start by turning off the power to the recessed light at the circuit breaker. Next, remove the trim ring around the light by unscrewing the screws that hold it in place. Once the trim ring is removed, you'll be able to access the housing of the recessed light.
Disconnect the electrical wires from the light fixture, then unscrew the screws that hold the housing in place. Carefully pull the housing out of the ceiling, being careful not to damage the drywall.
Step 3: Install the Junction Box
Once the recessed light is removed, you'll need to install a junction box. This will provide a safe and secure place to connect the electrical wires for the ceiling fan.
To install the junction box, first, mark the location of the box on the ceiling. Then, use a drill to create a hole for the box. Insert the junction box into the hole and secure it with screws.
Step 4: Connect the Electrical Wires
Now it's time to connect the electrical wires. First, connect the black wire from the ceiling fan to the black wire in the junction box. Then, connect the white wire from the ceiling fan to the white wire in the junction box. Finally, connect the green or bare copper wire from the ceiling fan to the ground wire in the junction box.
Once the wires are connected, use wire nuts to secure the connections. Make sure the wire nuts are tightened securely.
Step 5: Install the Ceiling Fan
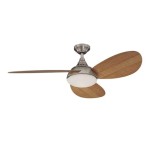
Now that the electrical wires are connected, you can install the ceiling fan. First, lift the ceiling fan into place and align it with the junction box. Then, secure the fan to the junction box using the screws that came with the fan.
Step 6: Turn on the Power
Once the ceiling fan is installed, you can turn on the power at the circuit breaker. The ceiling fan should now be operational.
Converting a recessed light to a ceiling fan is a relatively easy project that can be completed in a few hours. By following these steps, you can add both style and function to your home.

6 In Recessed Light Conversion Kit White Can Converter R56

Model R56 5 6 Inch Can Conversion With Designer Flat Medallion

Model R56 5 6 Inch Can Conversion With Designer Beveled Medallion

Recessed Light Converter Kit By Recesso Lights 10570 05 Rcs215473

Westinghouse Recessed Light Converter

The Can Converter 7 In Incandescent Remodel Or New Construction White Non Ic Open Recessed Light Kit Kits Department At Com

The Can Converter 7 In Incandescent Remodel Or New Construction White Non Ic Open Recessed Light Kit Kits Department At Com

Recessed Converter Kit With Mallot 13 Wide Ceiling Light 90w92 Lamps Plus

Recessed Converter Kit With Mallot 13 Wide Ceiling Light 90w92 Lamps Plus

The Can Converter 5 In Remodel White Ic Open Recessed Light Kit Cc 1 Uae Financial Markets Associationuae Association
Related Posts


