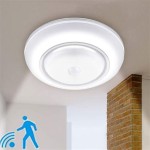
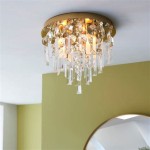
Essential Aspects of Diy Cage Light Ceiling Fan
DIY cage light ceiling fans are a stylish and functional addition to any home. They can provide both light and air circulation, and they can be customized to match any décor. But before you start your DIY project, it's important to consider a few essential aspects.
1. Choose the Right Fan Size
The size of the fan you need will depend on the size of the room where it will be installed. A good rule of thumb is to choose a fan with a blade span that is 1/3 to 1/2 the width of the room. For example, a 10-foot wide room would require a fan with a blade span of 3-5 feet.
2. Consider the Fan's Style
Cage light ceiling fans come in a variety of styles, from traditional to modern. Choose a style that will complement the décor of your home. For example, a traditional fan with a metal cage would be a good choice for a rustic or industrial-style home. A modern fan with a sleek, geometric design would be a good choice for a contemporary home.
3. Determine the Fan's Installation Location
The fan should be installed in a location where it will provide adequate air circulation. It should also be located away from any obstructions, such as furniture or light fixtures. Make sure that the fan is installed at the correct height. The bottom of the fan blades should be at least 7 feet above the floor.
4. Gather the Necessary Tools and Materials
Before you start installing the fan, make sure you have all the necessary tools and materials. You will need a screwdriver, a drill, wire cutters, and electrical tape. You will also need a ceiling fan mounting bracket and a wire nut.
5. Prepare the Electrical Wiring
The first step is to prepare the electrical wiring. Turn off the power to the room at the circuit breaker. Then, remove the old light fixture and disconnect the wires. Connect the wires from the fan to the wires from the ceiling using wire nuts. Make sure that the connections are secure.
6. Install the Mounting Bracket
Next, install the ceiling fan mounting bracket. The bracket should be mounted securely to the ceiling joist. Use screws to attach the bracket to the joist.
7. Hang the Fan
Once the mounting bracket is installed, you can hang the fan. Lift the fan up to the bracket and align the holes in the fan with the holes in the bracket. Insert the screws into the holes and tighten them until the fan is secure.
8. Connect the Electrical Wiring
The final step is to connect the electrical wiring. Turn off the power to the room at the circuit breaker. Then, connect the wires from the fan to the wires from the ceiling using wire nuts. Make sure that the connections are secure.
9. Turn on the Power
Once the wiring is connected, you can turn on the power to the room at the circuit breaker. The fan should now be operational.
10. Adjust the Fan Speed
The fan speed can be adjusted using the pull chain. The pull chain will usually have three settings: low, medium, and high.
11. Enjoy Your New Fan
Your new DIY cage light ceiling fan is now installed and ready to use. Enjoy the cool breeze and the stylish new addition to your home.
Unique Diy Light Kit Prestige Fans
Ceiling Fan Makeover Farmhouse Style
Diy Industrial Ceiling Fan With Garden Planter Cage Lights Upcycled Ugly
Cage Light Giveaway 1000bulbs Com Crazy Wonderful
Diy Modern Farmhouse Ceiling Fan Makeover For Under 30 Whiskey Whit
Ceiling Fan Light Covers The Honeycomb Home
One Room Challenge Week 4 Diy Farmhouse Ceiling Fan Update R At Home
Diy Industrial Ceiling Fan With Garden Planter Cage Lights Upcycled Ugly
Master Bedroom Makeover Part 3 Ceiling Fan Upcycle Farmhouse Style Cindy Roy
Related Posts