DIY Ceiling Light Canopy: A Comprehensive Guide to Adding Style to Your Lighting
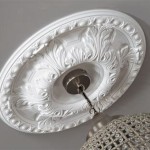
A ceiling light canopy, also known as a light base or mounting plate, is an essential component that connects your lighting fixture to the ceiling. Beyond its functional purpose, it can also serve as a decorative element, enhancing the overall aesthetic of your lighting design. Creating a DIY ceiling light canopy is a relatively simple and rewarding project that can add a personal touch to your home décor.
Materials Required
- Wooden board (1/2 inch thick, cut to the desired size of the canopy)
- Fabric or wallpaper (for covering the canopy)
- Adhesive (fabric glue or spray adhesive)
- Scissors or rotary cutter
- Measuring tape or ruler
- Pencil or chalk
- Sandpaper (for smoothing any rough edges)
- Electrical wire (for connecting the canopy to the light fixture)
- Screws or nails
Instructions
1. Prepare the Wooden Board: Cut the wooden board to the desired size and shape of the canopy. Sand any rough edges to ensure a smooth finish.
2. Cover the Canopy: Choose a fabric or wallpaper that complements your décor and cut it to the size of the canopy, allowing for a few inches of overlap on all sides. Apply adhesive to the wooden board and carefully place the fabric or wallpaper on top, smoothing out any wrinkles.
3. Secure the Canopy: Trim any excess fabric or wallpaper around the edges and secure it firmly to the wooden board using adhesive. Allow the adhesive to dry completely.
4. Attach the Electrical Wire: Determine the center of the canopy and make a small hole for passing the electrical wire. Connect the electrical wire to the light fixture and feed it through the hole.
5. Mount the Canopy: Hold the canopy in place on the ceiling and mark the position of the screw holes. Drill pilot holes for the screws and secure the canopy to the ceiling.
6. Hang the Light Fixture: Attach the light fixture to the electrical wire and screw it onto the canopy. Double-check the electrical connections before turning on the light.
Tips for Customization
- Use a variety of materials for the canopy cover, such as fabric, wallpaper, metal, or even decorative tiles.
- Paint or stain the wooden board to match the color scheme of your room.
- Add embellishments such as trims, beads, or tassels to enhance the look of the canopy.
- Consider using a larger-sized canopy to create a statement piece in the room.
Benefits of a DIY Ceiling Light Canopy
- Customization: Create a canopy that perfectly matches your style and décor.
- Cost-effective: DIY canopies are significantly cheaper than purchasing pre-made ones.
- Skill Development: Engage in a rewarding project that enhances your DIY skills.
- Unique Touch: Add a personal touch to your home lighting design.

Ceiling Canopy Base For Pendant Light Multi Size Diy Black White Gold

Ceiling Canopy Base For Pendant Light Multi Size Diy Black White Gold

Ceiling Light Canopies Lamp Repair Parts Shades Barn Lights Expert

3 Port White 4 7in Ceiling Canopy With Brass Hardware

Diy Bed Canopy Tutorial The Lilypad Cottage

February Diy Challenge Bedroom Canopy Dwell Beautiful

How To Make A Diy Hanging Light Field Court

Keenso Ceiling Light Hook Plate 2pcs Iron Chandelier Hanging Canopy Decoration Diy Fitting Accessory Ca

Diy Floral Canopy With Fairy Lights Lolly Jane

Diy Fairy Lights Canopy Mr Kate
Related Posts


