Essential Elements to Consider for a Stunning DIY Mason Jar Ceiling Fan Light
When crafting a DIY Mason Jar Ceiling Fan Light, meticulous attention should be paid to every detail to ensure impeccable aesthetics and functionality. This article delves into the fundamental aspects that will determine the success of your project.
Here are the key elements to consider:
1. Mason Jar Selection
The choice of mason jars sets the tone for your light fixture. Consider the desired aesthetic, size, and shape of the jars. Clear jars provide a versatile canvas for customization, while colored or textured jars add a unique touch. Ensure the jars are heat-resistant if you plan to use incandescent bulbs.
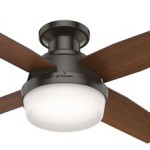
2. Ceiling Fan Base
The ceiling fan base supports the entire light fixture. Choose a sturdy base compatible with your ceiling type and the weight of the suspended jars. Consider the style of the base, as it should complement the overall design of the fixture.
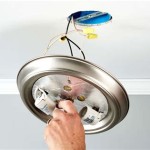
3. Electrical Wiring
Proper electrical wiring is crucial for the light fixture's safety and functionality. Engage a qualified electrician or follow meticulous safety guidelines. Use appropriate electrical components, such as sockets, wires, and switches, to ensure a secure and reliable connection.
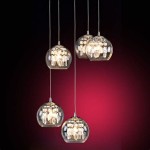
4. Pendant Light Kit
A pendant light kit provides the necessary components to suspend the jars from the ceiling fan base. This kit typically includes adjustable chains or cords, socket holders, and a canopy to conceal the electrical wiring. Choose a kit that supports the desired number and configuration of jars.
5. Lighting
The choice of bulbs determines the ambiance and illumination of your light fixture. Consider the desired brightness, color temperature, and energy efficiency. LED bulbs offer long-lasting and cost-effective options, while incandescent bulbs provide a warm and inviting glow.
6. Customization
The beauty of a DIY project lies in its personalization options. Experiment with different jar combinations, paint colors, or decorative elements to create a light fixture that reflects your unique style. Add wire cages, lace, or ribbons for an extra touch of charm.
7. Installation
Follow the manufacturer's instructions carefully when installing the light fixture. Consult an electrician if necessary to ensure proper installation and prevent electrical hazards. Secure the fan base securely to the ceiling and connect the electrical components as directed.
By carefully considering these essential aspects, you can create a stylish and functional DIY Mason Jar Ceiling Fan Light that will enhance the ambiance of any room. With a bit of creativity and attention to detail, you can transform everyday objects into a stunning work of art.

How To Makeover A Ceiling Fan With Mason Jars And Save 250 Nani S Notebook

Diy Mason Jar Ceiling Fan Globes 10 Steps With Pictures Instructables

How To Makeover A Ceiling Fan With Mason Jars And Save 250 Nani S Notebook

Rustic Mason Jar Ceiling Fan Light Kit Only With Vintage Pints Farmhouse Lighting Fixture Chandelier Pendant Flush Mount Track Industrial

How To Makeover A Ceiling Fan With Mason Jars And Save 250 Nani S Notebook

Diy Mason Jar Ceiling Fan Globes 10 Steps With Pictures Instructables

Mason Jar Ceiling Fan Light

Mason Jar Ceiling Fan Light Kit Only Farmhouse Chandelier

Diy Mason Jar Pendant Light Upcycle An Old Vanity Strip In Easy Steps

Diy Mason Jar Pendant Light Upcycle An Old Vanity Strip In Easy Steps
Related Posts