DIY Tray Ceiling Lighting: A Complete Guide
A tray ceiling is a beautiful architectural feature that can add depth and interest to any room. This style of ceiling is created by adding a recessed area in the center of the ceiling, which is often surrounded by moldings or trims. This recessed area, or "tray", can be used to house lighting fixtures, creating a stunning and sophisticated look.
If you're looking to add a touch of elegance to your home, installing tray ceiling lighting is a great way to do it. In this comprehensive guide, we'll provide you with everything you need to know to install tray ceiling lighting yourself, including the tools and materials you'll need, step-by-step instructions, and troubleshooting tips.
Tools and Materials
*- Drill
- Screwdriver
- Wire strippers
- Electrical tape
- Junction box
- Recessed lighting fixture
- Trim ring
- Light bulbs
Step-by-Step Instructions
1. Plan Your Layout: The first step is to plan the layout of your lighting fixtures. Decide how many lights you want to install and where you want them to be placed. Make sure to take into account the size of the tray and the location of any existing electrical wiring.
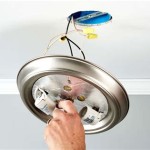
2. Install the Junction Box: Once you have planned your layout, you can begin installing the junction box. The junction box will provide a safe and secure place to connect the wires from your lighting fixtures. Use a drill to create a hole for the junction box in the center of the tray. Then, insert the junction box into the hole and secure it in place with screws.
3. Run the Wires: The next step is to run the wires from the junction box to each of the lighting fixtures. Use wire strippers to remove about 1/2 inch of insulation from the end of each wire. Then, twist the exposed wires together and secure them with electrical tape. Run the wires through the holes in the tray and connect them to the terminals on the lighting fixtures.
4. Install the Trim Ring: Once the wires are connected, you can install the trim ring. The trim ring will cover the gap between the lighting fixture and the tray. Place the trim ring over the lighting fixture and secure it in place with screws.
5. Install the Light Bulbs: The final step is to install the light bulbs. Simply screw the light bulbs into the sockets on the lighting fixtures.
Troubleshooting Tips
- If your lighting fixtures are not working, check the following:
- Make sure that the circuit breaker or fuse for the lighting is turned on.
- Check the connections between the wires and the lighting fixtures to make sure that they are secure.
- Try replacing the light bulbs.
Conclusion
Installing tray ceiling lighting is a great way to add a touch of elegance and sophistication to your home. By following the steps outlined in this guide, you can easily install tray ceiling lighting yourself and save money on professional installation costs.

Using Lighting The Smart Way To Highlight Tray Ceiling Hometone Home Automation And Guide

Superb Tray Ceiling Designs For Your Living Spaces

Using Lighting The Smart Way To Highlight Tray Ceiling Hometone Home Automation And Guide

Superb Tray Ceiling Designs For Your Living Spaces

How To Mount Crown Molding A Tray Ceiling

All You Need To Know About Tray Ceilings Bob Vila

Dining Room Coffered Tray Ceiling Wainscoting Moulding

Beautiful Diy Vaulted Ceiling Makeover Abbotts At Home
:max_bytes(150000):strip_icc()/ScreenShot2022-04-29at4.47.34PM-78c79c92595a4549bdf5866b3d98c93a.png?strip=all)
15 Tray Ceiling Paint Ideas That Really Shine

How To Build A Bulk Head Ceiling For M Bunnings Work Community
Related Posts


