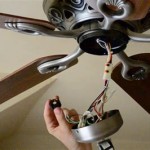
Flush Mount Ceiling Light Fixture: Installation Guide
Upgrading your home lighting is a great way to enhance its ambiance and functionality. Flush mount ceiling light fixtures offer a sleek and contemporary look, and they are relatively easy to install. With the right tools and a bit of patience, you can tackle this project yourself and save on the cost of hiring an electrician.
Gather Your Materials
Before you begin, gather the following materials:
* Flush mount ceiling light fixture * Screwdriver * Drill * Drill bit (size will vary depending on the fixture) * Wire strippers * Electrical tape * Safety glasses * GlovesSafety First
Always turn off the power to the circuit you will be working on at the main electrical panel. This is crucial for your safety, as it prevents any electrical shocks.
Locate the Junction Box
Locate the existing junction box where you will be installing the fixture. The junction box is typically attached to the ceiling and houses the electrical wires. If there is no existing junction box, you will need to install one.
Prepare the Wires
Use the wire strippers to remove about 1/2 inch of insulation from the ends of the black (hot), white (neutral), and ground (usually green or bare copper) wires coming from the junction box. Twist the exposed ends of the black wires together, the white wires together, and the ground wires together.
Connect the Fixture
Connect the black wires from the fixture to the black wires from the junction box. Twist the wires together and secure them with electrical tape. Repeat the same process for the white wires and the ground wires.
Mount the Fixture
Drill pilot holes into the ceiling around the junction box using the drill bit size specified in the fixture instructions. Insert the screws provided with the fixture through the holes and into the junction box. Tighten the screws until the fixture is securely mounted.
Install the Lamp(s)
Install the light bulb(s) into the fixture according to the manufacturer's instructions. Tighten the bulb(s) until they are secure.
Restore Power
Carefully turn on the power at the main electrical panel. The flush mount light fixture should now be operational.
Tips
* If you are not comfortable working with electricity, consult with a qualified electrician. * Make sure the light fixture is compatible with the junction box and the type of ceiling you have. * Use a level to ensure the fixture is mounted straight. * Connect the ground wires to the grounding screw on the junction box or the building's electrical system. * Always inspect the fixture and wiring for any damage before installing.
Light Fixture Flush Mount Installation Wattco Electric

The Ultimate Flush Ceiling Light Installation And Guide 21 22 Fancy Place

Led Flush Mount Ceiling Light Fixture 12 Inch 24w 3200lm 4000k Neutr Freeamzs

Mingbright 14 Inch Led Flush Mount Ceiling Light Fixture Dimmable Lamps For Hallway Bathroom Or Kitchen Damp Location Lamp 3000k Warm White Cetl Listed Com

Dinglilighting Led Flush Mount Ceiling Light Fixture 18w 8 86 Modern Round Flat Lighting For Kitchen Closet Garage Hallway Com

Commercial Electric 13 In White Oil Rubbed Broe Trims 1350 Lumens Led Flush Mount Ceiling Light Fixture With Night Adjustable Cct 56584112 The Home Depot

Commercial Electric 9 In White Oil Rubbed Broe Trims 800 Lumens Led Flush Mount Ceiling Light Fixture With Night Adjustable Cct 56582112 The Home Depot

How To Install A Semi Flush Mount Ceiling Light

Commercial Electric Spin Light 5 In Closet Basement Utility Led Flush Mount Ceiling 600 Lumens 4000k Bright White 8 Pack 54692141 8pk The Home Depot

Commercial Electric 15 In Orbit Led Brushed Nickel Flush Mount Ceiling Light 1600 Lumens Adjustable Color Temperatures Dimmable 564111110 The Home Depot
Related Posts

