Sg local ceiling fan light source triple color led replacement magnetic ee singapore how to replace leng8021 lepro 24w 13 inch flush mount fixture for kitchen bathroom bedroom porch hallway non dimmable 6 034 kit board panel assist you the fitting job include furniture home living lighting fans on carou true fine elis in 2 natural rattan semi with black canopy td10025cel depot darelo 10 elegant minimalist 3 cct selectable temperature round broe finish lamp 15w 1100 lm com lseb2022le1 tube 40 shape bulb panasonic 41833978 acrylic cover milky mat mass kg 1 impossible appliance equivalent one twin par premier fluorescent monotaro tri tone and installation 15 clever ideas low ceilings 2022 our picks commercial electric 49 x rectangular 3000 lumens 4000k bright white laundry room 54644141

Sg Local Ceiling Fan Light Source Triple Color Led Replacement Magnetic Ee Singapore

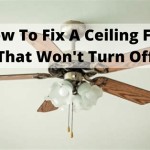
How To Replace Led Ceiling Light Leng8021

Lepro 24w 13 Inch Led Flush Mount Ceiling Light Fixture For Kitchen Bathroom Bedroom Porch Hallway Non Dimmable

6 034 Led Light Kit Replacement Board Panel For Flush Mount Ceiling

Assist You To Replace The Ceiling Light Fitting Job Include Fixture Furniture Home Living Lighting Fans On Carou

True Fine Elis 13 6 In 2 Light Natural Rattan Semi Flush Mount Ceiling With Black Canopy Td10025cel The Home Depot

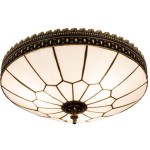
Darelo Dimmable 10 Inch Led Ceiling Light Elegant Minimalist Flush Mount Lighting Fixture With 3 Cct Selectable Color Temperature Round Broe Finish Lamp Replacement 15w 1100 Lm Com

Lseb2022le1 Led Ceiling Light Round Tube 40 Shape Bulb Color Panasonic 41833978 Acrylic Cover Milky Mat Mass Kg 1 2 Replacement Impossible Appliance Equivalent One Inch Twin Par Premier Fluorescent Lamp Monotaro Singapore

Led Ceiling Light Tri Tone Lighting Magnetic Replacement And Installation Furniture Home Living Fans On Carou

15 Clever Lighting Ideas For Low Ceilings 2022 Our Picks

Commercial Electric 49 In X 10 Rectangular Light Fixture Led Flush Mount 3000 Lumens 4000k Bright White Kitchen Lighting Laundry Room 54644141 The Home Depot

Ge Led Motion Soft White 100w Replacement Integrated Ceiling Fixture 1 Pack

Lowry Flush Mount Ceiling Light Fireworks Lightzey Thelightzey

Lepro 24w 13 Inch Led Flush Mount Ceiling Light Fixture For Kitchen Bathroom Bedroom Porch Hallway Non Dimmable

Darelo Dimmable 10 Inch Led Ceiling Light Elegant Minimalist Flush Mount Lighting Fixture With 3000k Color Temperature Round Nickel Finish Lamp Replacement 15w 1100 Lumens Com

Darelo Dimmable 10 Inch Led Ceiling Light Elegant Minimalist Flush Mount Lighting Fixture With 3 Cct Selectable Color Temperature Round Broe Finish Ce Lights

24 Ceiling Lights For Under 100 I Diy

Lollo Handmade Flush Mount Ceiling Light Minimal Geometric

Flush Mount And Semi Lighting Guide Lowe S
Sg local ceiling fan light source how to replace led flush mount fixture kit replacement board fitting job true fine elis 13 6 in 2 natural darelo dimmable 10 inch lseb2022le1 round tri tone lighting ideas for low ceilings kitchen laundry room