Essential Aspects of Hampton Bay Ceiling Fan Installation Guide
Installing a Hampton Bay ceiling fan can enhance the comfort and aesthetics of your home. To ensure a safe and successful installation, it's important to pay meticulous attention to the manufacturer's instructions. This comprehensive guide highlights key aspects to consider during the installation process.
Pre-Installation Considerations
Choosing the right location for your ceiling fan is crucial. Ensure that there is at least 7 feet of clearance between the fan blades and the floor. Additionally, select a location that allows for unobstructed airflow and avoid areas near doorways or windows where the fan may interfere with movement.
Verify that the ceiling structure can support the weight of the fan and that you have the necessary electrical wiring in place. If you are unsure about any aspect of the installation, consult with a qualified electrician for assistance.
Assembling the Fan
Carefully unpack the fan components and follow the assembly instructions provided. Typically, this involves attaching the fan blades to the motor housing, connecting the downrod to the motor, and installing the canopy.
Handle the fan blades with care to prevent damage. Use a soft cloth or gloves to avoid leaving fingerprints or smudges on the blades.
Electrical Wiring and Connection
Turn off the power at the electrical panel before proceeding with any wiring. Connect the wires from the ceiling junction box to the corresponding wires on the fan. Ensure that the ground wire is properly connected to the grounding screw on the mounting bracket.
Wrap electrical tape around all wire connections to secure them and prevent short circuits. Reconnect the power and check that the fan operates correctly.
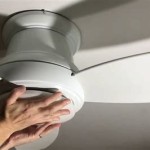
Mounting the Fan
Locate the mounting bracket and secure it to the ceiling junction box using the screws provided. Utilize a level to ensure the bracket is level and properly aligned.
Lift the assembled fan and carefully place it onto the mounting bracket. Align the screws on the fan base with the corresponding holes on the bracket and tighten them securely.
Balancing the Fan
Once the fan is mounted, check for any wobble or vibration. If the fan is not balanced, it can create noise and damage the fan over time.
Attach the included balancing kit to the fan blades and follow the instructions provided to balance the fan. This typically involves adding small weights to the blades until the fan operates smoothly.
Final Touches
Reinstall the light fixture or any decorative elements according to the manufacturer's instructions. Ensure that all screws and bolts are tightened securely.
Clean the fan blades with a soft, damp cloth to remove any debris or fingerprints. Allow the fan to dry completely before operating it.
Conclusion
By following these essential steps, you can ensure a safe and successful Hampton Bay ceiling fan installation. Remember to prioritize safety, attention to detail, and proper electrical wiring. If you encounter any difficulties or uncertainties, do not hesitate to consult a qualified electrician for assistance.

Hampton Bay Farmington 52 In Indoor Natural Iron Ceiling Fan 32764 The Home Depot

Is Hampton Bay Manual Use And Care Guide For Ceiling Fan

Hampton Bay Yg327b Bn Instructions Assembly Free Borrow And Streaming Internet Archive

Hampton Bay Antigua Plus 56 In Led Indoor Oil Rubbed Broe Ceiling Fan With Light Kit 73540 The Home Depot

Hampton Bay 54 Indo Mena Inch Ceiling Fan User Guide

Hampton Bay Yg988 Bn Gazebo Iii 42 Inch Ceiling Fan User Guide

Hampton Bay 51538 Installation Guide Free Borrow And Streaming Internet Archive

Hampton Bay Ak330 Bn Belvoy 70 Inch Ceiling Fan User Guide

Hampton Bay 50248 Lakemoore 48 Inch Ceiling Fan User Guide

Hampton Bay Midili 44 In Indoor Led Gilded Espresso Dry Rated Ceiling Fan With 5 Reversible Blades Light Kit And Remote Control 68100 The Home Depot
Related Posts