Hampton Bay Ceiling Fan Light Chain Replacement: A Comprehensive Guide
Replacing a light chain on your Hampton Bay ceiling fan can be a simple and straightforward task that requires minimal effort and expertise. To ensure that the process runs smoothly, it's essential to gather the necessary tools and materials, understand the steps involved, and follow safety precautions.
Required Tools and Materials
- Replacement light chain
- Pliers
- Wire cutters
- Electrical tape
- Step ladder or stool
Safety Precautions
Before commencing any electrical work, it's crucial to ensure safety. Ensure that the power supply to the ceiling fan is turned off at the circuit breaker. Wear gloves and safety glasses to protect yourself from potential hazards.
Step-by-Step Guide
1. Remove the Existing Chain
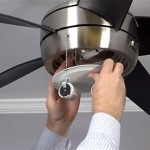
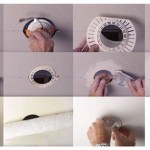
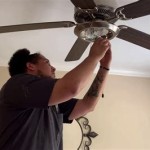
Carefully climb the step ladder or stool to reach the ceiling fan. Locate the existing light chain and disconnect it from the ceiling fan motor housing. Use pliers to gently squeeze the plastic connectors and pull them apart. Remove the old chain by pulling it through the housing.
2. Install the New Chain
Feed the end of the new light chain through the opening in the ceiling fan motor housing. Connect the light chain to the motor housing by pushing the plastic connectors together. Ensure that the connections are secure.
3. Reconnect the Wires
Identify the black and white wires from the fan motor housing and the light chain. Strip approximately 1/2 inch of insulation from the wire ends and twist the wires of the same color together. Wrap electrical tape securely around the connections to prevent any exposed wires.
4. Reinstall the Chain
Pull the light chain through the housing until it reaches the desired length. Reattach the chain to the hook on the bottom of the fan. Ensure that the chain is taut but not too tight.
5. Power On and Test
Turn the power back on at the circuit breaker and check the operation of the light chain. Pull the chain to ensure that the light turns on, off, and adjusts to different brightness levels.
Tips for a Successful Chain Replacement
- Purchase an exact replacement chain to ensure proper fit and functionality.
- Disconnect the power before starting any work.
- Be gentle when handling the wires to avoid damage.
- Use electrical tape generously to prevent any potential electrical hazards.
- If you are not confident in performing the replacement, contact a licensed electrician for professional assistance.
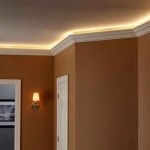
By following these steps and observing the safety guidelines, you can successfully replace the light chain on your Hampton Bay ceiling fan. Enjoy the updated look and functionality of your ceiling fan with minimal effort and cost.

Ceiling Fan Light Repair Home Tutor

How To Install A Hampton Bay Ceiling Fan Light Kit Fans Lighting

Hampton Bay Williamson Led Universal Ceiling Fan Light Kit 64401 The Home Depot

Hampton Bay 11 In Warm And Bright White Light Universal Led Ceiling Fan Kit 53701101 The Home Depot

The Chain Is Stuck On My Ceiling Fan Light Ehow

52 Gazebo Iii Tal

Hampton Bay Universal Matte Black Ceiling Fan Led Light Kit 52229 The Home Depot

Troubleshooting Your Remote Controls Step By Hampton Bay Ceiling Fans Lighting

4 Ways To Replace A Ceiling Fan Pull Chain Switch Wikihow

Harbor Breeze Armitage 52 In Brushed Nickel Led Indoor Flush Mount Ceiling Fan With Light 5 Blade The Fans Department At Com
Related Posts