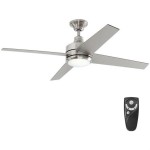
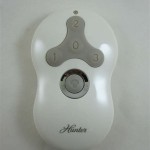
Hampton Bay Ceiling Fan with Remote: Essential Installation Aspects
Ceiling fans are a wonderful addition to any home, providing comfort and style. Hampton Bay ceiling fans are known for their high quality and stylish designs. Installing one of these fans is a relatively simple process, but there are a few important things to keep in mind to ensure a safe and successful installation.
1. Safety First
Before you begin any electrical work, it is important to turn off the power to the circuit that you will be working on. This can be done by flipping the breaker or removing the fuse that controls that circuit. Once the power is off, you can begin the installation process.
2. Choosing the Right Location
The first step is to choose the right location for your ceiling fan. The fan should be centered in the room and at least 7 feet above the floor. You will also need to make sure that there is enough clearance around the fan so that it can operate safely.
3. Installing the Mounting Bracket
The next step is to install the mounting bracket. The mounting bracket is what will support the weight of the fan, so it is important to make sure that it is installed securely. The mounting bracket will typically come with screws or bolts that you will need to use to attach it to the ceiling.
4. Wiring the Fan
Once the mounting bracket is installed, you can begin wiring the fan. The fan will come with a wiring diagram that you will need to follow. The wiring diagram will show you how to connect the wires from the fan to the wires from the ceiling.
5. Installing the Fan Blades
Once the fan is wired, you can install the fan blades. The fan blades will typically come with screws or bolts that you will need to use to attach them to the fan. Make sure that the fan blades are tightened securely.
6. Installing the Light Kit (Optional)
If your fan came with a light kit, you can now install it. The light kit will typically come with instructions that you will need to follow. Once the light kit is installed, you can turn the power back on and test the fan.
7. Balancing the Fan
Once the fan is installed, you may need to balance it. Balancing the fan will help to reduce any wobbling or vibration. To balance the fan, you will need to use a fan balancing kit. The fan balancing kit will come with instructions that you will need to follow.
Conclusion
Installing a Hampton Bay ceiling fan with remote is a relatively simple process, but it is important to follow the instructions carefully to ensure a safe and successful installation. By following these steps, you can enjoy the comfort and style of a Hampton Bay ceiling fan for years to come.

Troubleshooting Your Remote Controls Step By Hampton Bay Ceiling Fans Lighting

Successful Hampton Bay Ceiling Fan Installation Projects Stories Smartthings Community

Hampton Bay 3 Sd Universal Ceiling Fan Thermostatic Remote Control Damp Rated 98108 The Home Depot

Successful Hampton Bay Ceiling Fan Installation Projects Stories Smartthings Community

Hampton Bay Remote Installation Instructions Ehow

Troubleshooting Your Remote Controls Step By Hampton Bay Ceiling Fans Lighting

Hampton Bay Riley 44 In Indoor Led Brushed Nickel Ceiling Fan With Light Kit 5 Quickinstall Reversible Blades And Remote Control 52144 The Home Depot

Hampton Bay Midili 44 In Indoor Led Brushed Nickel Dry Rated Ceiling Fan With 5 Reversible Blades Light Kit And Remote Control 68044 The Home Depot

Hampton Bay Holly Springs 52 In Indoor Matte Black Led Ceiling Fan With Light Downrod And Reversible Blades Included Yahoo Ping

New Hampton Bay Southwind Ii 52 034 Indoor Led Ceiling Fan W Light Kit Amp Remote
Related Posts


