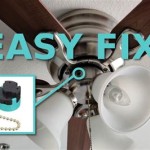
Hampton Bay Ceiling Fan With Remote Installation Instructions
Installing a Hampton Bay ceiling fan with remote control can be a great way to improve the comfort and style of your home. With a few simple steps, you can have your new fan up and running in no time.
Tools and Materials You'll Need
- Phillips head screwdriver
- Flat head screwdriver
- Wire strippers
- Electrical tape
- Ladder
- Safety glasses
- Hampton Bay ceiling fan with remote control
- Mounting bracket
- Screws
- Wire nuts
Safety First
Before you begin, make sure to turn off the power to the circuit that you will be working on. Also, be sure to wear safety glasses to protect your eyes from any flying debris.
Installing the Mounting Bracket
The first step is to install the mounting bracket. The mounting bracket is the metal plate that will attach the fan to the ceiling. To install the mounting bracket, simply follow these steps:
- Locate the center of the ceiling joist where you want to install the fan.
- Hold the mounting bracket up to the ceiling and mark the location of the screw holes.
- Drill pilot holes at the marked locations.
- Secure the mounting bracket to the ceiling using the provided screws.
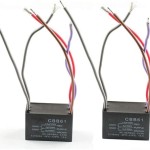
Wiring the Fan
Once the mounting bracket is installed, you can begin wiring the fan. To wire the fan, follow these steps:
- Connect the black wire from the fan to the black wire from the ceiling.
- Connect the white wire from the fan to the white wire from the ceiling.
- Connect the green wire from the fan to the ground wire from the ceiling.
- Secure all of the wire connections with wire nuts.
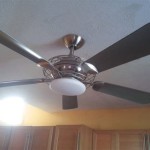
Installing the Fan
Once the fan is wired, you can install it on the mounting bracket. To install the fan, simply follow these steps:
- Lift the fan up to the mounting bracket.
- Align the holes in the fan with the holes in the mounting bracket.
- Secure the fan to the mounting bracket using the provided screws.
Installing the Blades
The next step is to install the fan blades. To install the fan blades, simply follow these steps:
- Locate the holes in the fan motor.
- Insert a fan blade into each hole.
- Secure the fan blades using the provided screws.
Installing the Remote Control
The final step is to install the remote control. To install the remote control, simply follow these steps:
- Insert the batteries into the remote control.
- Program the remote control to the fan.
- Mount the remote control on the wall using the provided hardware.
Enjoy Your New Ceiling Fan
Once the remote control is installed, you can enjoy your new Hampton Bay ceiling fan. The fan will provide you with years of comfort and style.

Troubleshooting Your Remote Controls Step By Ceiling Fans Lighting

How To Install A Hampton Bay Ceiling Fan With Pictures Wikihow

Hampton Bay Fanelee 54 In White Color Changing Led Broe Smart Ceiling Fan With Light Kit And Remote Powered By Hubspace 52132 The Home Depot

Hampton Bay 70830 Instructions Assembly Manualzz

Hampton Bay Ceiling Fan Troubleshooting Guide The Home Depot

Hampton Bay Fc120 Carl 48 Inch Led Indoor Air Filtering Ceiling Fan User Guide

Hampton Bay 98139 3 Sd Universal Ceiling Fan Wireless Wall Control User Guide

Hampton Bay Ceiling Fan Troubleshooting Guide The Home Depot

Universal Ceiling Fan Remote Control Kit With Up Down Light Replacement For Hampton Bay Harbor Breeze Hunter Litex Westinghouse 3 Sd Dimmer Uc7078t Uc7067rc L3h2010fanhd Hd6 28r Com

Hampton Bay Fc120 Carl 48 Inch Led Indoor Air Filtering Ceiling Fan User Guide
Related Posts