Hampton Bay Ceiling Fan With Remote Wiring Instructions
Installing a ceiling fan with a remote control can be a great way to improve the comfort and style of your home. Hampton Bay ceiling fans come with easy-to-follow wiring instructions, and with a little bit of electrical know-how, you can have your new fan up and running in no time.
Safety First
Before you begin, be sure to turn off the power to the circuit that will be powering the fan. You should also make sure that the ceiling joists are strong enough to support the weight of the fan. If you are not comfortable working with electricity, it is best to hire a qualified electrician to install the fan for you.
Gather Your Materials
In addition to the ceiling fan, you will need the following materials:
- Wire strippers
- Electrical tape
- Screwdriver
- Wire nuts
- Drill (if mounting the fan into a wood joist)
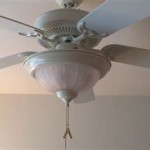
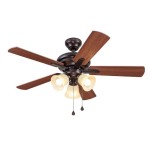
Mount the Fan
The first step is to mount the fan to the ceiling. If you are mounting the fan into a wood joist, you will need to drill four pilot holes and then screw in the mounting bracket. If you are mounting the fan into a concrete ceiling, you will need to use concrete anchors. Once the mounting bracket is in place, you can attach the fan to the bracket.
Wire the Fan
Once the fan is mounted, you will need to wire it. The wiring diagram for your fan will be included in the instructions. Typically, the black wire from the fan will be connected to the black wire from the ceiling, the white wire from the fan will be connected to the white wire from the ceiling, and the green or bare copper wire from the fan will be connected to the ground wire from the ceiling. Use wire nuts to connect the wires together, and then wrap the connections with electrical tape.
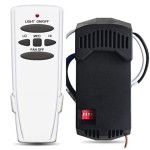
Install the Remote Receiver
The next step is to install the remote receiver. The receiver will typically be attached to the ceiling near the fan. Connect the wires from the receiver to the corresponding wires from the fan. Again, use wire nuts to connect the wires together, and then wrap the connections with electrical tape.
Test the Fan
Once the fan is wired, you can turn on the power to the circuit and test the fan. The fan should start spinning when you press the button on the remote control. If the fan does not start spinning, check the wiring connections to make sure that they are correct.
Enjoy Your New Fan
Congratulations! You have now successfully installed your Hampton Bay ceiling fan with remote control. Enjoy the comfort and style of your new fan for years to come.

Troubleshooting Your Remote Controls Step By Hampton Bay Ceiling Fans Lighting

Hampton Bay 98131 3 Sd Universal Ceiling Fan Premier Remote Control User Guide

Hamptonbay Rgb 52spard Hollis 52 Inch Ceiling Fan User Manual

3 Sd Ceiling Fan Pull Chain Switch Wiring Pickhvac

Ceiling Fan Wiring Schematics Fans More

Hampton Bay 70830 Instructions Assembly Manualzz

Hampton Bay 68142 Vaurgas 44 Inch Ceiling Fan User Guide

Universal Ceiling Fan Remote Control Hd5 Receiver 28r 3 Sd And Light Dimmer Compatible With 53t 11t 35t Uc7030t Uc9050t Etc For Harbor Breeze Hampton Bay Hunter Com

Hunter Fan 41228 1 Type 3 Ceiling Fans Instruction Manual
Related Posts