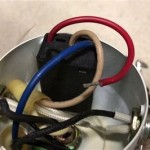
How to Replace a Ceiling Lamp Socket
Replacing a ceiling lamp socket is a relatively simple task that can be completed in a few easy steps. Whether you're dealing with a flickering light, a faulty connection, or a damaged socket, this guide will provide you with the necessary instructions to safely and effectively replace the old socket with a new one.
Before you begin, it's important to note that working with electricity can be dangerous. If you're not comfortable working with electrical wiring, it's best to consult a qualified electrician.
Step 1: Safety First
Before starting any electrical work, it's crucial to ensure your safety. Turn off the power to the ceiling light at the main electrical panel. This will prevent any electrical shocks or injuries.
Step 2: Remove the Old Socket
Locate the socket cover, which is usually held in place by screws. Remove the screws, detach the cover, and carefully disconnect the wires from the socket. Be sure to note the position of each wire for easy reconnection later.
Step 3: Detach the Socket from the Ceiling
Once the wires are disconnected, gently remove the socket from the ceiling. There may be screws or clips holding it in place. If necessary, use a screwdriver or pliers to loosen the screws or release the clips.
Step 4: Prepare the New Socket
Unpack the new ceiling lamp socket and verify that all the necessary parts are included. In most cases, you'll need the socket, mounting screws, and wire connectors.
Step 5: Connect the Wires
Connect the wires from the ceiling to the terminals on the new socket. Match the colors of the wires to the corresponding terminals on the socket (e.g., black to black, white to white, and green or bare copper to ground).
Step 6: Mount the New Socket
Carefully insert the new socket into the ceiling hole and align it with the mounting screws or clips. Secure the socket in place by tightening the screws or engaging the clips.
Step 7: Test the Connection
Turn the power back on at the main electrical panel. Check if the light turns on and works properly. If the light is still flickering or malfunctioning, there may be an issue with the wiring or the new socket itself.
Additional Tips:
- Use a voltage tester to ensure that the power is off before touching any wires.
- If the wires are old or damaged, replace them with new ones.
- Match the wattage rating of the new socket to the light fixture.
- If you encounter any difficulties or uncertainties, don't hesitate to contact a qualified electrician.

How To Replace A Ceiling Light Socket 13 Steps With Pictures

How To Replace A Ceiling Light Socket 13 Steps With Pictures

How To Replace Porcelain Light Sockets Ehow

How To Replace A Ceiling Light Socket 13 Steps With Pictures

How To Replace Install A Light Fixture The Art Of Manliness

How To Replace A Ceiling Light Socket 13 Steps With Pictures

How To Replace Install A Light Fixture The Art Of Manliness

Repair A Light Fixture Diy Family Handyman

Mounting Light Fixtures Fine Homebuilding

Replacing A Ceiling Fan Light With Regular Fixture Jlc
Related Posts

