How to Add Ceiling Light to Existing Switch
Installing a new ceiling light to a room with an existing switch can be a convenient solution when enhancing your lighting setup. It offers versatility, improved aesthetics, and added functionality to your space. However, to achieve a successful installation, there are several crucial steps to consider. This article will delve into the essential aspects of adding a ceiling light to an existing switch, ensuring you achieve a safe and satisfactory outcome.
1. Safety Precautions
Electricity can be hazardous, so taking appropriate safety measures is paramount before commencing any electrical work. Ensure you have a firm understanding of electrical principles and the safety guidelines for your region. If uncertain, consult a qualified electrician to prevent accidents.
2. Identifying the Existing Circuit
Determine the electrical circuit supplying power to the existing switch. You can do this by turning off the circuit from the breaker panel and checking if the switch no longer functions. Alternatively, use a voltage tester to confirm the presence or absence of electricity.
3. Installing the Light Fixture
Mount the ceiling light fixture according to the manufacturer's instructions. Secure it to the ceiling, ensuring it is level and stable. Connect the fixture's wires (typically black, white, and ground) to the corresponding wires in the ceiling electrical box.
4. Connecting to the Switch
Run new wires from the ceiling electrical box to the existing switch. Connect the new wires to the switch terminals, ensuring proper polarity (black wire to brass terminal, white wire to silver terminal). Match the connections to the corresponding colors of the existing wires in the switch box.
5. Restoring Power
Once all connections are complete, restore power to the circuit from the breaker panel. Test the switch to ensure the new ceiling light turns on and off correctly. Double-check all connections and ensure they are secure to prevent potential electrical hazards.
6. Finishing Touches
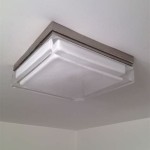
Install the faceplate of the switch and the diffuser of the ceiling light. These components provide a finished look and protect the electrical components. Additionally, consider using a dimmer switch to control the brightness of the new light fixture.
7. Verification
After completing the installation, thoroughly inspect the setup to ensure everything is functioning as intended. Ensure the light switch operates smoothly, and the ceiling light is securely fastened and provides adequate illumination. If you encounter any issues, refer to the manufacturer's instructions or consult a professional electrician.

Add A New Light Fixture Wiring Diagrams Do It Yourself Help Com

Extending A Lighting Circuit Step By Guide And

Add A New Light Fixture Wiring Diagrams Do It Yourself Help Com

Adding An Extra Light From A Switch

Extending A Lighting Circuit Step By Guide And

Help Installing Wiring New Ceiling Light Tying Into Existing Switch Doityourself Com Community Forums

Add A New Light Fixture Wiring Diagrams Do It Yourself Help Com
Adding Overhead Light To An Existing Switch Diy Home Improvement Forum

Wiring A Ceiling Fan And Light With Diagrams Ptr

Add A New Light Fixture Wiring Diagrams Do It Yourself Help Com
Related Posts


