How to Effortlessly Change a High Ceiling Light Bulb
Illuminating those lofty heights can be daunting, but changing a high ceiling light bulb doesn't have to be a nightmare. With the right tools and a bit of know-how, you can swiftly restore your home's radiance.
Gathering Essential Tools
Before embarking on your mission, arm yourself with the following tools:
- Step stool or ladder (stable, with a sturdy base)
- Replacement light bulb (correct wattage and type)
- Work gloves (optional, for grip and protection)
- Cloth or rag (cover light bulb)
- Flashlight (optional, for illuminating dark corners)
Safety First
Always prioritize safety. Ensure the electrical circuit supplying the light fixture is switched off at the breaker panel or fuse box. Double-check with a voltage tester to verify that the power is truly disconnected.
Ascending to the Fixture
Cautiously ascend the step stool or ladder, ensuring it's placed on a level and stable surface. Maintain a steady grip and reach the fixture without overextending yourself. Use a flashlight if necessary to illuminate hidden screws or clips.
Removing the Fixture Cover
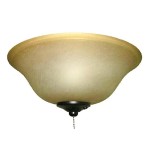
Most high ceiling light fixtures have a cover or globe that houses the light bulb. Locate the screws, clips, or latches holding the cover in place and carefully remove them. Handle the cover gently to avoid breakage.
Removing the Old Bulb
Carefully grasp the old light bulb with a cloth or rag to prevent oils from your hands from transferring to the new bulb. Gently unscrew the bulb counterclockwise and withdraw it from the socket. If the bulb is stuck, use a gentle rocking motion to loosen it.
Installing the New Bulb
Align the new light bulb with the socket and gently screw it in clockwise until snug. Do not overtighten as this can damage the bulb or socket. Ensure the bulb is securely in place but avoid excessive force.
Reassembling the Fixture
Replace the cover or globe, ensuring it fits securely back into place. Tighten any screws, clips, or latches to hold the cover firmly. Double-check that all parts are securely fastened.
Restoring Power
Return to the breaker panel or fuse box and restore power to the light fixture circuit. Flip the switch or reset the breaker. Your high ceiling light should now shine brightly, vanquishing the darkness.
Additional Tips
- If possible, enlist a helper to hold the ladder or stool for stability.
- Wear work gloves to protect your hands from heat or sharp edges.
- Use a non-abrasive cloth or rag to handle the bulbs, preventing scratches.
- Dispose of the old light bulb properly at a recycling center or hazardous waste facility.

How To Change Light Bulb In High Ceiling Tools For Kitchen Bathroom

Mr Longarm Light Bulb Changing Pole Attachment For Tall Ceilings

Changing A Light Bulb R Osha

How To Change A Light Bulb In High Ceiling Repair Prepare

How To Change Light Bulb In High Ceiling Home Inspection Geeks

Home Lightbulb Scaffold

How To Change A High Ceiling Light Bulb The Guys

Winch Lets Your Change Chandelier Light Bulbs At Ground Level Aday

Changing Chandelier Lightbulbs R Homemaintenance

Who Can I Hire For Light Bulb Changing Services
Related Posts