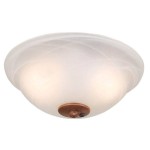
How To Change A Light Ceiling Rose
A ceiling rose is a decorative item that is fitted to the ceiling around a light fitting. It can be made from a variety of materials, including plaster, wood, or plastic. Ceiling roses are available in a wide range of styles, so you can find one to match your décor. If your ceiling rose is damaged or outdated, you may need to replace it.
Changing a ceiling rose is a relatively simple task that can be completed in a few hours. However, it is important to follow the steps carefully to avoid any electrical hazards. Here is a step-by-step guide on how to change a light ceiling rose:
1. Turn off the electricity
The first step is to turn off the electricity to the light fitting. You can do this by turning off the circuit breaker or fuse that supplies power to the light. Once the electricity is off, you can remove the light fitting from the ceiling rose.
2. Remove the old ceiling rose
Once the light fitting is removed, you can start to remove the old ceiling rose. If the ceiling rose is made of plaster, you will need to carefully chip away the plaster around the edges of the rose. Once the plaster is removed, you can unscrew the ceiling rose from the ceiling.
If the ceiling rose is made of wood or plastic, you may be able to remove it by simply unscrewing it from the ceiling. However, if the ceiling rose is glued or nailed to the ceiling, you will need to carefully pry it loose.
3. Install the new ceiling rose
Once the old ceiling rose is removed, you can install the new ceiling rose. Start by screwing the new ceiling rose into the ceiling. Once the ceiling rose is screwed in, you can connect the wires from the light fitting to the ceiling rose. Make sure that the wires are securely connected and that there are no loose wires.
4. Attach the light fitting
Once the wires are connected, you can attach the light fitting to the ceiling rose. Screw the light fitting into the ceiling rose until it is secure.
5. Turn on the electricity
Once the light fitting is attached, you can turn on the electricity. If the light fitting works properly, then you have successfully changed the ceiling rose.
6. Finishing touches
Once the ceiling rose is installed and the light fitting is working properly, you can add the finishing touches. You can paint or decorate the ceiling rose to match your décor. You can also add a light shade or diffuser to the light fitting to create a different look.
Tips
- Before you start working on the ceiling rose, make sure that you have all of the necessary tools and materials.
- If you are not comfortable working with electricity, you should hire a qualified electrician to change the ceiling rose for you.
- When you are removing the old ceiling rose, be careful not to damage the ceiling.
- Make sure that the new ceiling rose is properly secured to the ceiling.
- If you have any questions about how to change a ceiling rose, you can consult a professional electrician.

How To Swap An Old Ceiling Rose With A Modern Light Fixture Plumbing Electric Wonderhowto

How To Install Our Ceiling Roses Authentic Additions

How To Replace A Ceiling Rose

Top Tip Replacing A Ceiling Rose And Pendant Light R Diy

How To Install Our Ceiling Roses Authentic Additions

Ceiling Rose Wiring Diagrams Harmonised Colours Light Fitting

Changing Old Ceiling Rose To Spotlights Diynot Forums

How To Install Ceiling Roses An Easy Follow Guide

Inside The Circuit Pendant Lighting Light Switch Wiring Homeowner Faqs

Advice On Ceiling Rose Diynot Forums
Related Posts

