How To Change A Light Fixture In The Ceiling
Changing a light fixture in the ceiling may seem like a daunting task, but with the right tools and a little bit of know-how, it's a job that most DIYers can handle. Here are the essential steps to help you get the job done safely and efficiently.
Safety First
Before you start, it's important to take some safety precautions. Turn off the power to the light fixture at the circuit breaker or fuse box. This will prevent any electrical shocks while you're working.
Once the power is off, use a voltage tester to confirm that there is no electricity flowing to the fixture. You can also remove the light bulb to be safe.
Gather Your Tools
To change a light fixture, you'll need the following tools:
- Screwdriver (Phillips or flathead, depending on the fixture)
- Wire cutters or strippers
- Electrical tape
- Voltage tester
- Step ladder or stool
- New light fixture
Remove the Old Fixture
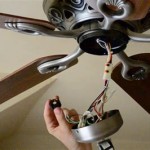
Once you have your tools gathered, you can start by removing the old light fixture. Most light fixtures are held in place by screws or bolts. Use a screwdriver to remove the screws or bolts, and then carefully lower the fixture from the ceiling.
If the fixture is wired directly into the ceiling, you'll need to cut the wires using wire cutters. Be sure to leave yourself enough wire to work with when you install the new fixture.
Prepare the New Fixture
Before you install the new fixture, you'll need to prepare it by attaching the mounting bracket to the fixture. The mounting bracket will hold the fixture in place on the ceiling.
Once the mounting bracket is attached, you can start wiring the fixture. Connect the black wire from the fixture to the black wire from the ceiling. Connect the white wire from the fixture to the white wire from the ceiling. And connect the ground wire from the fixture to the ground wire from the ceiling.
Use electrical tape to secure the wire connections. Make sure the connections are tight and secure.
Install the New Fixture
Once the fixture is wired, you can install it on the ceiling. Lift the fixture into place and align it with the mounting bracket. Secure the fixture to the mounting bracket using the screws or bolts that came with the fixture.
Once the fixture is secure, you can turn the power back on at the circuit breaker or fuse box. Test the fixture to make sure it's working properly.
Enjoy Your New Light
Congratulations! You've successfully changed the light fixture in your ceiling. Now you can enjoy your new light and the satisfaction of a job well done.

How To Replace Install A Light Fixture The Art Of Manliness

Easy Ways To Replace An Led Recessed Light Bulb 13 Steps
Dome Ceiling Light Bulb Replacement Ifixit Repair Guide

How To Install Ceiling Light Homeserve Usa

Mounting Light Fixtures Fine Homebuilding

Replacing A Ceiling Fan Light With Regular Fixture Jlc

How To Change Your Light Fixture In Seven Easy Steps A Pinch Of Joy

How To Replace An Old Fluorescent Light Fixture Young House Love

How To Install A Ceiling Light Fixture Diy Family Handyman

How To Change A Recessed Light Bulb
Related Posts

