How To Change Ceiling Fan Light Kit

By | November 11, 2017

Essential Aspects of Changing a Ceiling Fan Light Kit

Ceiling fans are a practical and stylish addition to any room, providing both cooling and illumination. If the light kit on your ceiling fan needs to be changed, it's a relatively straightforward task that can be completed in a few steps.

Materials Required:

  • Replacement light kit
  • Ladder or step stool
  • Phillips-head screwdriver
  • Electrical tape (optional)

Safety Precautions:

Before starting, ensure that the power to the ceiling fan is turned off at the circuit breaker or fuse box. This is crucial for your safety.

Step 1: Remove the Fan Blades

Unplug the light kit's wires from the fan's motor. Locate the screws that secure the fan blades to the motor housing and remove them. Carefully lift off the fan blades and set them aside.

Step 2: Disconnect the Light Kit

Unscrew the screws holding the light kit in place. Grip the light kit and gently pull it down from the fan's canopy. Disconnect the wires connecting the light kit to the fan's motor by twisting the wire nuts counterclockwise.

Step 3: Wire the New Light Kit

Take the new light kit and connect its wires to the corresponding wires on the fan's motor. Match the colors of the wires and twist the wire nuts clockwise to secure the connections. If desired, you can wrap electrical tape around the connections for added protection.

Step 4: Install the Light Kit

Position the new light kit on the fan's canopy and align the screw holes. Secure the light kit with the screws, tightening them until snug.

Step 5: Reattach the Fan Blades

Lift each fan blade and align it with the corresponding blade holder. Secure the blades by tightening the screws. Make sure the blades are balanced evenly before turning on the fan.

Step 6: Restore Power and Test

Restore power to the circuit breaker or fuse box. Turn on the ceiling fan and check if the new light kit is functioning properly. If there are any issues, double-check the connections and ensure the wires are securely fastened.

Tips:

  • Choose a light kit that is compatible with your ceiling fan model.
  • If you're not comfortable working with electricity, consult a qualified electrician.
  • Handle the fan blades with care to avoid damaging them.
  • If you notice any flickering or unusual sounds after installing the new light kit, turn off the power and inspect the connections.

Conclusion:

Changing a ceiling fan light kit is a manageable task that can enhance the functionality and aesthetics of your room. By following these steps and adhering to safety precautions, you can successfully replace the light kit and enjoy the improved illumination from your ceiling fan.


How To Replace A Ceiling Fan Light Kit

How To Replace A Ceiling Fan Light Kit Smafan Com

Ceiling Fan Light Kit Installation How To

Ceiling Fan Light Kit Installation How To

Light Kit To Your Ceiling Fan

How To Add A Light Kit Your Ceiling Fan Mr Electric

Ceiling Fan Light Kit Installation How To

Ceiling Fan Light Kit Installation How To

Wiring A Ceiling Fan And Light With

Wiring A Ceiling Fan And Light With Diagrams Ptr

Ceiling Fan Light Repair Home

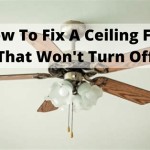
Ceiling Fan Light Repair Home Tutor

Wiring A Ceiling Fan And Light With

Wiring A Ceiling Fan And Light With Diagrams Ptr

Wiring A Ceiling Fan And Light With

Wiring A Ceiling Fan And Light With Diagrams Ptr

Replace Your Ceiling Fan Chain

How To Easily Repair Or Replace Your Ceiling Fan Chain

How To Install A Ceiling Fan Hunter

How To Install A Ceiling Fan Hunter


Leave a Reply

Your email address will not be published. Required fields are marked *

This site uses Akismet to reduce spam. Learn how your comment data is processed.