Essential Guide to Changing Recessed Light Bulbs in High Ceilings
Recessed lighting fixtures, often called can lights, provide ample illumination and enhance the aesthetics of any room. However, when a bulb in a high-ceilinged recessed fixture burns out, it can be a daunting task to replace it. Here's a comprehensive guide to changing recessed light bulbs in high ceilings safely and efficiently.
Safety Precautions
Before attempting any electrical work, it's crucial to prioritize safety:
- Turn off the power supply to the light fixture at the circuit breaker or fuse box.
- Use a sturdy step ladder or platform to reach the fixture securely.
- Wear gloves for hand protection.
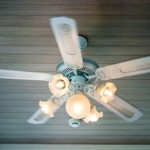
Accessing the Bulb
Recessed light bulbs are typically secured in place with retaining clips or a twist-and-lock mechanism:
- Retaining Clips: Use a flat-head screwdriver or putty knife to gently pry open the spring-loaded clips holding the trim in place. Once the trim is released, carefully pull it down to expose the bulb.
- Twist-and-Lock: Firmly grasp the trim and twist it counterclockwise to unlock and remove it.
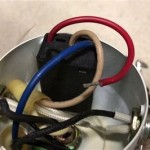
Removing the Old Bulb
Depending on the bulb type, there are two common methods for removal:
- PAR and MR16 Bulbs: Push the bulb into the fixture slightly and twist it counterclockwise to detach it from the socket.
- BR and A Bulbs: Gently pull the bulb straight down to release it.
Installing the New Bulb
Insert the new bulb into the socket, ensuring it is aligned correctly:
- PAR and MR16 Bulbs: Align the pins on the bulb with the slots in the socket and push the bulb into place. Twist it clockwise to secure it.
- BR and A Bulbs: Push the bulb straight up into the socket until it fits snugly.
Reinstalling the Trim
Place the trim back into the fixture and gently push it upward to secure it:
- Retaining Clips: Align the trim with the retaining clips and snap it into place.
- Twist-and-Lock: Slide the trim over the fixture and twist it clockwise to lock it.
Restoring Power and Testing
Once the trim is secure, restore power to the fixture at the circuit breaker or fuse box. Turn on the light switch to test if the new bulb is functioning correctly.
Additional Tips
- Use a light bulb that matches the wattage and type specified for the fixture.
- If the retaining clips or trim are damaged, replace them for proper bulb retention.
- For high ceilings, consider using a bulb changer tool to extend your reach and simplify the process.
By following these steps and adhering to safety precautions, you can effortlessly change recessed light bulbs in high ceilings, maintaining the illumination and aesthetics of your home.

How To Change Light Bulb In High Ceiling Home Inspection Geeks

How To Change Light Bulb In High Ceiling Tools For Kitchen Bathroom

Easy Ways To Replace An Led Recessed Light Bulb 13 Steps

How To Change Light Bulb In High Ceiling Tools For Kitchen Bathroom

How To Change A Recessed Light Bulb

How To Change Light Bulb In High Ceiling Home Inspection Geeks

Mr Longarm Light Bulb Changing Pole Attachment For Tall Ceilings

How To Change Chandelier Light Bulbs In High Ceilings 2 Interesting Ways

How To Change A Light Bulb In High Ceiling Repair Prepare

How To Change Light Bulb In High Ceiling Home Inspection Geeks
Related Posts