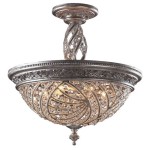
How to Clean Flush Mount Ceiling Lights: Essential Aspects
Maintaining the cleanliness of your flush mount ceiling lights is crucial for both aesthetic and functional reasons. A clean light fixture provides optimal illumination, enhances the ambiance of a room, and extends its lifespan. Understanding the essential aspects of cleaning flush mount ceiling lights is key to ensuring their effective maintenance.
In this article, we will delve into the critical aspects of cleaning flush mount ceiling lights, providing step-by-step instructions, safety considerations, and tips to keep your fixtures spotless and functioning at their best.
1. Safety First
Before embarking on the cleaning process, it is paramount to ensure safety. Turn off the power to the light fixture at the circuit breaker or fuse box. Allow the fixture to cool completely before touching it.
Wear gloves to protect your hands from potential electrical hazards or cleaning agents. If the fixture is particularly high, use a stepladder that is stable and in good condition.
2. Tools and Materials
Gather the necessary tools and materials for the cleaning process:
- Soft, clean cloths or microfiber towels
- Mild dish soap or glass cleaner
- Bucket or bowl of warm water
- Vacuum cleaner with a soft brush attachment
- Optional: Stepladder
- Optional: Gloves
3. Cleaning the Lens or Shade
The lens or shade of the light fixture accumulates dust and smudges over time. To clean it effectively:
- Remove the lens or shade from the fixture according to the manufacturer's instructions.
- Dip a soft cloth or microfiber towel in warm water mixed with a mild dish soap or glass cleaner.
- Gently wipe the surface of the lens or shade to remove dirt and debris.
- Rinse the lens or shade with clean water and dry it thoroughly with a clean cloth.
4. Cleaning the Base or Housing
The base or housing of the light fixture also requires cleaning:
- Use a vacuum cleaner with a soft brush attachment to remove dust from the base or housing.
- If there is noticeable dirt or grime, wipe down the surface with a damp cloth dipped in warm water and mild dish soap.
- Rinse with clean water and dry thoroughly with a clean cloth.
Caution: Avoid using abrasive cleaners or strong chemicals, as they may damage the finish of the fixture.
5. Reassembly and Inspection
Once the lens or shade and base or housing are clean, reassemble the fixture according to the manufacturer's instructions. Ensure that all screws or brackets are securely tightened.
Before turning the power back on, inspect the fixture for any loose wires or damage. If any issues are detected, consult an electrician.
6. Regular Maintenance
Regular cleaning of flush mount ceiling lights prevents the accumulation of dust and dirt, extending their lifespan and maintaining optimal illumination. Aim to clean the fixtures every few months, or more frequently in dusty environments.
Conclusion
Maintaining clean flush mount ceiling lights is essential for a well-lit, aesthetically pleasing, and safe home environment. By following the essential aspects outlined in this article, you can effectively clean your ceiling lights, ensuring their optimal performance and longevity.

Replacing Flush Mount Light With Pendant

Diy Flush Mount Lighting 2 Ways To Modernize Lights

The Most Popular Flush Mount Lighting Styles To Know Ledmyplace

A Clean Flush Mounted Light Near The Fireplace Young House Love

Hampton Bay Flaxmere 12 In Matte Black Dimmable Integrated Led Flush Mount Ceiling Light With Frosted White Glass Shade Hb1023c 43 The Home Depot

Flu4063a Flush Mount Ceiling Lights Lighting By Safavieh

Puck Ceiling Light By Stone Lighting Cl468frwhled Stn584924

360 Lighting Davis Modern Ceiling Light Flush Mount Fixture 13 Wide Oil Rubbed Broe 2 Frosted Glass Dome Shade For Bedroom Kitchen Hallway Com

Flu4096a Flush Mount Ceiling Lights Lighting By Safavieh

Hampton Bay Flaxmere 12 In Brushed Nickel Dimmable Led Integrated Flush Mount With Frosted White Glass Shade Hb1023c 35 The Home Depot

