How To Connect Ceiling Light Switch: A Step-by-Step Guide
Installing or replacing a ceiling light switch may seem like a daunting task, but it's a relatively simple electrical project that can be completed in a matter of minutes. With a few basic tools and some safety precautions, you can easily upgrade your home's lighting with a new switch.
Here's a step-by-step guide on how to connect a ceiling light switch:
1. Safety First
Before you start, ensure your safety by turning off the power to the light switch at the circuit breaker panel. Use a non-contact voltage tester to verify that there's no current flowing through the wires.
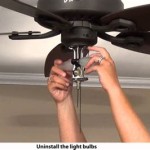
2. Remove the Old Switch (if applicable)
If you're replacing an existing light switch, use a screwdriver to unscrew the faceplate and remove it. Then, disconnect the wires from the old switch by loosening the screws holding them in place. Note the position of each wire for proper reconnection.
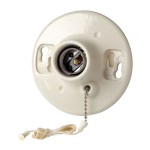
3. Identify the Wires
In most homes, ceiling light switches have three wires: a black wire (hot wire), a white wire (neutral wire), and a bare copper wire or green wire (ground wire). The black and white wires carry electricity, while the ground wire provides a safe path for any stray current to flow back to the ground.
4. Connect the Wires
Connect the black wire from the switch to the black wire in the ceiling electrical box. Similarly, connect the white wire from the switch to the white wire in the box. Finally, connect the bare copper or green wire from the switch to the ground wire in the box.
Use wire connectors or electrical tape to secure the connections. Ensure the connections are tight and insulated to prevent any loose contacts.
5. Mount the New Switch
Once the wires are connected, tuck them neatly back into the electrical box. Position the new light switch over the box and screw it in place using the provided screws.
6. Install the Faceplate
Align the faceplate over the switch and secure it with the screws. Ensure the faceplate is flush with the wall and sits evenly.
7. Turn on the Power
Return to the circuit breaker panel and turn the power back on. Test the new light switch by flipping it on and off to ensure it functions correctly.
Tips for Success
- Use a voltage tester to verify that the power is off.
- Identify the wires correctly to avoid any electrical hazards.
- Secure the wire connections tightly to prevent loose contacts.
- If you're working with old wiring or have any doubts, consult a licensed electrician for assistance.

How To Wire A Ceiling Fan Light Switch Quora

Wiring A Ceiling Fan And Light With Diagrams Ptr

Light Switch Wiring Diagrams

Replacing A Ceiling Fan Light With Regular Fixture Jlc

Wiring A Ceiling Fan And Light With Diagrams Ptr

How To Install A One Way Light Switch Socketsandswitches Com

Light Switch Wiring Diagrams

How To Rewire A Light Switch Control Ceiling Fan Power Source Enters At The Projects By Peter

How To Hang A Ceiling Light

Adding Wall Switch And Another Ceiling Light Loop Controlling 2 Fixtures Doityourself Com Community Forums
Related Posts