How to Fix a Ceiling Rose Light
Ceiling rose light fittings, often found in older homes, are decorative features that enhance the aesthetics of a room. However, like any electrical fixture, they can occasionally experience issues that require attention. Here is a step-by-step guide on how to approach the task of fixing a ceiling rose light:
Inspect the Fuse Box
Before you begin any work, it is crucial to ensure safety by turning off the power at the fuse box. Start by locating the fuse or circuit breaker responsible for the ceiling rose light and switch it off. This will prevent the flow of electricity to the light fitting.
Remove the Globe and Shade
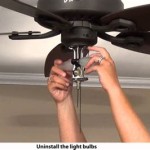
Once the power is turned off, carefully remove the globe from the light fitting by unscrewing it counterclockwise. Next, locate and detach the lampshade, which is typically held in place by a bayonet fitting or screws. Set these components aside.
Unscrew the Ceiling Rose
Locate the decorative cover plate that conceals the ceiling rose. Gently pry it off using a slotted screwdriver or a small knife, taking care not to damage the paint or wallpaper. Once the cover plate is removed, you will see the ceiling rose. Unscrew the screws that hold the ceiling rose in place and carefully detach it from the ceiling.
Check for Loose Connections
With the ceiling rose exposed, inspect the electrical connections for any signs of looseness. Ensure that the wires are securely fastened to the terminals using wire nuts or screw terminals. If any connections are loose, tighten them using a screwdriver or pliers, but avoid overtightening.
Replace Faulty Components
If the connections are secure but the light still does not work, there may be a faulty component that needs to be replaced. Start by inspecting the lamp holder for any visible damage. If the lamp holder is cracked or broken, it will need to be replaced. Additionally, check the wiring and insulation for any signs of damage or fraying. Replace any faulty components as necessary.
Check for Power
Before reassembling the light fitting, it is essential to check if power is reaching the ceiling rose. Use a voltage tester to test for live terminals. If there is no power, the problem may lie in the wiring or the fuse box. Seek professional assistance if you cannot identify the cause of the power outage.
Reassemble the Light Fitting
Once the issue has been resolved, you can reassemble the light fitting. First, attach the ceiling rose to the ceiling and tighten the screws. Next, connect the wires to the terminals, ensuring they are secure. Replace the lamp holder if necessary. Finally, screw in the globe and reattach the lampshade.
Reset the Fuse or Circuit Breaker
Return to the fuse box and reset the fuse or circuit breaker that you turned off earlier. This will restore power to the ceiling rose light. Switch on the light to confirm that it is working correctly.
Conclusion
Fixing a ceiling rose light requires careful attention to detail and safety precautions. By following these steps and inspecting the various components, you can effectively troubleshoot and resolve most common issues. However, if you encounter any electrical problems beyond your expertise, it is advisable to seek assistance from a qualified electrician.

How To Install Our Ceiling Roses Authentic Additions

How To Fit A Ceiling Rose Installation Tips

How To Install Our Ceiling Roses Authentic Additions

Fixing Light Fittings To Victorian Ceiling Roses Houzz

How To Put Up A Ceiling Rose 12 Steps With Pictures Wikihow

How To Fit A Ceiling Rose Installation Tips

How To Fix Ceiling Rose After Re Plastering Mumsnet

How To Swap An Old Ceiling Rose With A Modern Light Fixture Plumbing Electric Wonderhowto

How To Put Up A Ceiling Rose 12 Steps With Pictures Wikihow

Inside The Circuit Pendant Lighting Light Switch Wiring Homeowner Faqs
Related Posts


