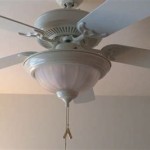
How to Repair a Ceiling Light Pull Switch
A malfunctioning ceiling light pull switch can be a frustrating and potentially hazardous issue. Fortunately, it is often a relatively simple repair that can be completed in a matter of minutes. Here's a step-by-step guide to help you fix your ceiling light pull switch:
1. Gather Your Tools and Materials:
Before starting, make sure you have the necessary tools and materials. You will need:
- A new pull switch
- A screwdriver (either a flathead or Phillips, depending on the switch type)
- Electrical tape
- Wire strippers or a utility knife
2. Safety First:
Electrical work can be dangerous, so it is crucial to take safety precautions. Before starting, turn off the power to the light fixture at the circuit breaker or fuse box. Also, ensure the light switch is in the "Off" position.
3. Remove the Old Switch:
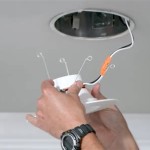
Locate the canopy, which is the decorative cover that conceals the electrical connections. Remove the canopy by unscrewing the screws that hold it in place. Once the canopy is removed, you will see the pull switch assembly.
Use the screwdriver to loosen the screws that hold the pull switch in place. Carefully pull the switch out of the electrical box.
4. Disconnect the Wires:
The pull switch will have two wires connected to it. Use a screwdriver to loosen the terminal screws and disconnect the wires. Note the position of each wire and which screw it was connected to.
5. Prepare the New Switch:
Take the new pull switch and strip about 1/2 inch of insulation from the ends of the wires. Twist the exposed wires together to form a secure connection.
6. Connect the Wires:
Connect the wires from the new switch to the terminals on the electrical box, ensuring that each wire is connected to the same terminal as it was on the old switch.
7. Install the New Switch:
Push the new switch into the electrical box and tighten the screws that hold it in place. Make sure the switch is securely fastened.
8. Reattach the Canopy:
Place the canopy back over the electrical box and tighten the screws that hold it in place.
9. Test the Switch:
Turn on the power at the circuit breaker or fuse box and flip the light switch to the "On" position. The light should now turn on when you pull the switch.
10. Troubleshooting:
If the light still does not turn on after you have replaced the switch, there may be another issue. Check the following:
- Make sure the wires are securely connected to the terminals.
- Check that the light bulb is not burned out.
- If you have a multimeter, test the switch and the wiring for continuity.
Conclusion:
Replacing a ceiling light pull switch is a relatively straightforward task that can be completed in a few simple steps. By following these instructions carefully, you can restore function to your light fixture and ensure a safe and well-lit space.

Pull Chain Ceiling Light Conversion D Oh I Y

Ceiling Fan Switch Zing Ear Ze 109 Two Wire Light With Pull Cords For Fans Lamps And Wall Lights Chain Control Replacement On Off 2 Pack Brass

Pull Chain Sd Control Casablanca Fan Repair

4 Ways To Replace A Ceiling Fan Pull Chain Switch Wikihow

How To Replace A Pull Cord Switch Fitting Or Repairing Bathroom Switches

How To Install A One Way Light Switch Socketsandswitches Com

Ceiling Fan Light Repair Home Tutor
Ceiling Fan Pull Chain Switch Replacement Ifixit Repair Guide

4 Ways To Replace A Ceiling Fan Pull Chain Switch Wikihow

How To Replace A Pull Cord Switch Fitting Or Repairing Bathroom Switches
Related Posts

