How to Fix a Pull Chain on a Hunter Ceiling Fan
A broken pull chain on a ceiling fan can be a minor annoyance or a major inconvenience, depending on how often you use the fan. If your Hunter ceiling fan's pull chain is broken, don't despair! Replacing it is a relatively easy repair that you can do yourself with a few basic tools.
Materials You'll Need
- New pull chain
- Screwdriver
- Wire cutters
- Electrical tape
Step-by-Step Instructions
1. Turn off the power to the fan.
This is a crucial safety step that should never be skipped. To turn off the power, go to your home's electrical panel and locate the circuit breaker or fuse that controls the fan. Turn it off.
2. Remove the light kit (if applicable).
Some Hunter ceiling fans have a light kit attached to the bottom of the fan. If yours does, you'll need to remove it before you can access the pull chain mechanism. To do this, simply unscrew the screws that hold the light kit in place and carefully lift it off.
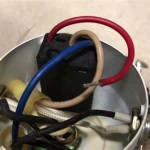
3. Remove the pull chain assembly.
The pull chain assembly is typically held in place by one or two screws. Use a screwdriver to remove the screws and then carefully pull the assembly out of the fan.
4. Disconnect the old pull chain.
The old pull chain is attached to the pull chain assembly by a small metal hook. Use a pair of wire cutters to cut the hook and then remove the old pull chain.
5. Attach the new pull chain.
Hook the new pull chain onto the metal hook on the pull chain assembly. Make sure that the pull chain is the correct length for your fan. If it's too long, you can trim it to size with a pair of scissors.
6. Reinstall the pull chain assembly.
Carefully insert the pull chain assembly back into the fan. Make sure that the wires are not pinched or damaged. Secure the assembly with the screws that you removed earlier.
7. Reinstall the light kit (if applicable).
If you removed the light kit, now is the time to reinstall it. Simply align the light kit with the holes on the bottom of the fan and screw it back into place.
8. Turn on the power to the fan.
Go back to your home's electrical panel and turn on the circuit breaker or fuse that controls the fan. Test the pull chain to make sure that it's working properly.
Troubleshooting Tips
If you're having trouble fixing the pull chain on your Hunter ceiling fan, here are a few troubleshooting tips:
- Make sure that the power to the fan is turned off.
- Check the wires on the pull chain assembly for any damage. If any of the wires are broken or frayed, you'll need to replace the assembly.
- Make sure that the new pull chain is the correct length for your fan. If it's too long, you can trim it to size with a pair of scissors.
- If you're still having trouble, you may need to call a qualified electrician for help.

Ceiling Fan Light Repair Home Tutor

Stubborn Ceiling Fan Pull Chain Diy Home Improvement Forum

Ceiling Fan Light Repair Home Tutor

Top 6 Technical Faults With A Hunter Ceiling Fan

Crestfield Hunterexpress With 3 Led Lights 52 Inch Ceiling Fan Hunter

Pull Chain Ceiling Fans Hunter Fan

Kenilworth With Led 60 In Ceiling Fan Hunter

Pro S Best With Light 52 Inch Ceiling Fan Hunter

52 Led Builder Ceiling Fan Includes Light Bulb Hunter Target

Shady Grove With 3 Lights 52 Inch Ceiling Fan Hunter
Related Posts


