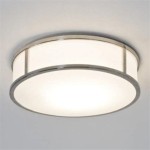
How to Hang a Light From the Ceiling
Hanging a light from the ceiling may seem like a daunting task, but it's actually quite simple with the right tools and a bit of preparation. Whether you're replacing an existing light fixture or installing a new one, following these steps will ensure a successful and safe installation.
Tools and Materials
Before you begin, gather the necessary tools and materials:
- Light fixture
- Screwdriver
- Electrical tape
- Wire strippers or a utility knife
- Drill (optional)
- Ceiling hook or mounting bracket (if not included with the fixture)
- Safety glasses
Safety Precautions
Safety should always be a top priority when working with electricity. Before starting, turn off the power to the circuit at the breaker panel.
Wear safety glasses to protect your eyes from debris or flying sparks.
Inspect the wiring before touching anything. If you see any frayed or damaged wires, do not proceed and contact an electrician.
Steps
- Determine the Mount Location: Decide where you want to hang the light and mark the desired location on the ceiling.
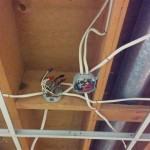
- Locate the Electrical Box: Use an electrical stud finder to locate the junction box in the ceiling. This is where the wires will connect to the fixture.
- Install a Ceiling Hook or Mounting Bracket (if needed): If the light fixture does not come with a built-in mounting bracket, you'll need to install a ceiling hook or bracket. Drill a pilot hole and screw it into the ceiling using the provided hardware.
- Prepare the Wires: Turn off the power and disconnect the old light fixture if replacing one. Cut the wires to the appropriate length, leaving about 6 inches of excess. Strip about 1 inch of insulation from the ends of the wires using wire strippers or a utility knife.
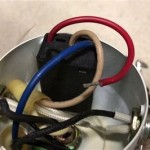
- Connect the Wires: Connect the wires to the appropriate terminals on the light fixture. Typically, black wires (live) connect to black or brass terminals, white wires (neutral) connect to white or silver terminals, and green or bare copper wires (ground) connect to green terminals.
- Wrap with Electrical Tape: Secure the wire connections with electrical tape by wrapping it around the terminals and exposed wire several times.
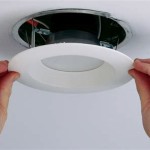
- Mount the Fixture: Hook or screw the light fixture onto the ceiling hook or bracket.
- Restore Power and Test: Turn on the power at the breaker panel and switch on the light to test its functionality.
Tips for Success
- Read the manufacturer's instructions carefully before beginning.
- Use the correct size and type of screws and mounting hardware.
- Tighten all connections securely but avoid overtightening.
- Double-check all connections before restoring power.
- If you encounter any problems or are unsure about any step, contact a licensed electrician for assistance.
Conclusion
Hanging a light from the ceiling is a straightforward task that anyone with basic tools and safety precautions can accomplish. By following these steps, you can successfully and safely install a new light fixture in your home.

How To Hang Lights From A Ceiling 13 Steps With Pictures

How To Make A Diy Hanging Light Field Court
How To Hang A Swag Light And Brighten Any Room The Diy Playbook

How To Hang A Ceiling Light Without Wiring Hawk Hill
How To Hang A Swag Light And Brighten Any Room The Diy Playbook

How To Hang Pendant Lights 9 Inventive Ideas Bob Vila

How To Install Pendant Lights Homeserve Usa
How To Hang Pendant Lights 9 Inventive Ideas Bob Vila

Mounting Light Fixtures Fine Homebuilding

How To Hang Fairy Lights On Ceiling
Related Posts

