How to Install a Ceiling Fan with a Remote Control
Installing a ceiling fan with a remote control can be a great way to improve the comfort and style of your home. Here is a step-by-step guide to help you get the job done safely and efficiently.
Step 1: Gather Your Tools and Materials
Before you start, make sure you have all the necessary tools and materials. You will need a:
- Ceiling fan with remote control
- Screwdriver
- Drill
- Electrical tape
- Wire nuts
- Safety glasses
- Ladder
Step 2: Shut Off the Power
Safety first! Before you begin any electrical work, turn off the power to the circuit that will be powering the fan. You can do this by flipping the breaker or removing the fuse.
Step 3: Prepare the Ceiling
Locate the electrical box in the ceiling where you want to install the fan. The box should be properly sized to support the weight of the fan. If the box is not adequate, you will need to replace it with a larger one.
Step 4: Mount the Ceiling Fan
Attach the mounting bracket to the electrical box using the provided screws. Next, lift the fan into place and secure it to the mounting bracket. Make sure the fan is level before tightening the screws.
Step 5: Connect the Electrical Wires
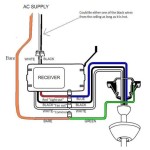
Connect the black wire from the fan to the black wire from the electrical box. Connect the white wire from the fan to the white wire from the electrical box. Connect the green or bare copper ground wire from the fan to the green or bare copper ground wire from the electrical box.
Step 6: Install the Fan Blades
Install the fan blades according to the manufacturer's instructions. Most fan blades will simply slide onto the motor housing and lock into place.
Step 7: Install the Light Kit (Optional)
If your fan came with a light kit, install it according to the manufacturer's instructions. This will typically involve connecting the wires from the light kit to the wires from the fan and then screwing the light kit into place.
Step 8: Install the Remote Control Receiver
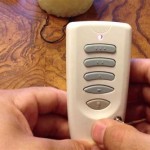
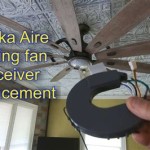
The remote control receiver is typically a small box that mounts to the ceiling near the fan. Install the receiver according to the manufacturer's instructions. This will typically involve connecting the wires from the receiver to the wires from the fan and then screwing the receiver into place.
Step 9: Install the Remote Control Battery
Install the battery into the remote control. The type of battery will vary depending on the model of remote control.
Step 10: Test the Fan and Remote Control
Turn on the power to the circuit and test the fan. Make sure the fan rotates smoothly and that the remote control works properly.
Tips
- If you are not comfortable working with electricity, it is best to hire a qualified electrician to install your ceiling fan.
- Make sure to read the manufacturer's instructions carefully before beginning installation.
- Use a ladder that is the proper height for the job.
- Wear safety glasses to protect your eyes from flying debris.
Conclusion
Installing a ceiling fan with a remote control is a relatively simple project that can be completed in a few hours. By following these steps, you can safely and easily add a touch of comfort and style to your home.
I Am Installing A Remote To Ceiling Fan Where Does The Red Wire Go Quora

How To Wire A Ceiling Fan Control Using Dimmer Switch

Wiring For A Ceiling Fan With Dimmer Switch And Remote Doityourself Com Community Forums

Ceiling Fan Remote With 2 Wires Doityourself Com Community Forums

Converting An Existing Ceiling Fan To A Remote Control

Ceiling Fan Wiring Diagram

How To Install A Ceiling Fan Two Wall Switches What Bb Built

Converting An Existing Ceiling Fan To A Remote Control

How To Wire A Ceiling Fan Control Using Dimmer Switch

How To Wire A Ceiling Fan Control Using Dimmer Switch
Related Posts

