How to Install a Ceiling Fan with Dimmer Switch
Upgrading your ceiling fan with a dimmer switch can enhance both style and functionality. A dimmer switch allows you to adjust the fan's speed and light output, creating a comfortable and inviting ambiance in any room. Here's a comprehensive guide to help you install a ceiling fan with a dimmer switch:
Materials Needed:
- Ceiling fan with light kit
- Dimmer switch compatible with fan motor and light
- Electrical wire (14 AWG or larger)
- Wire connectors
- Screwdriver
- Electrical tape
Safety First:
Before starting any electrical work, turn off the power at the circuit breaker or fuse box. Use a non-contact voltage tester to ensure the power is off.
Step 1: Remove Existing Fan (if applicable):
If you have an existing ceiling fan, disconnect it from the power supply and remove it from the ceiling. Label each wire for easy identification during reinstallation.
Step 2: Mount the Fan Bracket:
Secure the mounting bracket that came with your ceiling fan to the electrical box in the ceiling using the provided screws.
Step 3: Install the Dimmer Switch:
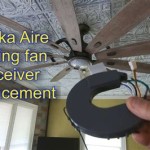
Remove the faceplate of the existing switch and disconnect the wires. Connect the dimmer switch wires to the appropriate terminals according to the wiring diagram provided with the switch. Secure the switch to the switch box and replace the faceplate.
Step 4: Prepare the Electrical Wires:
Strip about 1/2 inch of insulation from the ends of the wires coming from the ceiling and the fan. Twist the exposed wires together for each connection.
Step 5: Connect the Wires:
- Black (hot) wire: Connect the black wire from the fan to the black wire from the dimmer switch.
- White (neutral) wire: Connect the white wire from the fan to the white wire from the dimmer switch.
- Blue (light) wire: Connect the blue wire from the fan (if present) to the blue wire from the dimmer switch.
- Green (ground) wire: Connect the green wire from the fan to the bare copper ground wire from the electrical box.
Step 6: Secure the Connections:
Twist wire connectors onto each connection and wrap electrical tape around the connectors for added security.
Step 7: Mount the Fan:
Hang the ceiling fan on the mounting bracket and secure it with the provided screws.
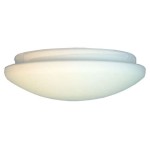
Step 8: Install the Light Fixture:
Insert the light bulbs into the fan's light fixture and secure them. Connect the fixture to the fan's electrical wires.
Step 9: Test the Fan and Dimmer:
Restore power to the circuit and turn on the fan and dimmer switch. The fan should rotate and the lights should dim and brighten smoothly.
Additional Tips:
- Use a ceiling fan-rated dimmer switch to ensure compatibility and avoid any damage to the fan motor.
- If you're not comfortable working with electricity, hire a qualified electrician for safe and proper installation.
- Regularly clean your ceiling fan to maintain its performance and aesthetics.
Installing a ceiling fan with a dimmer switch is a relatively straightforward task that can enhance the functionality and style of your room. By following these steps carefully, you can enjoy the comfort and convenience of a dimmable ceiling fan in your home.

How To Wire A Ceiling Fan Control Using Dimmer Switch

Ceiling Fan Wiring Diagram With Light Dimmer

Wiring A Ceiling Fan And Light With Diagrams Ptr

Wiring A Ceiling Fan And Light With Diagrams Ptr

How To Wire A Dimmer Switch Fan Quora

Wiring A Ceiling Fan And Light With Diagrams Ptr

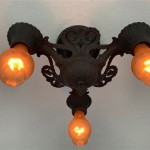
Replace Light Fixture W Ceiling Fan R Askanelectrician

Replacing A Ceiling Fan Light With Regular Fixture Jlc

Ceiling Fan Wiring Diagram Power Into Light Single Dimmer

Wiring A Ceiling Fan And Light With Diagrams Ptr
Related Posts