How to Install a Ceiling Fan with Existing Wiring
Installing a ceiling fan with existing wiring is a relatively straightforward project that can be completed in a few hours. However, it is important to take the necessary safety precautions and follow the instructions carefully to ensure a safe and successful installation.
Safety First
Before you begin, turn off the power to the room where you will be installing the fan at the circuit breaker panel. Also, make sure to wear safety glasses and gloves to protect yourself from any potential hazards.
Gather Your Materials
You will need the following materials to install a ceiling fan with existing wiring:
- Ceiling fan
- Mounting bracket
- Electrical wire (14-gauge or 12-gauge)
- Wire nuts
- Screwdriver
- Drill
- Level
Prepare the Electrical Wiring
If there is no existing electrical wiring in the ceiling, you will need to run new wire from the nearest electrical box. This is a job that is best left to a qualified electrician.
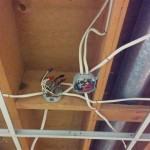
If there is existing electrical wiring, you will need to identify the wires that will power the fan. The black wire is the hot wire, the white wire is the neutral wire, and the green or bare copper wire is the ground wire.
Mount the Ceiling Fan Bracket
The ceiling fan bracket is the metal plate that will support the fan from the ceiling. It is important to mount the bracket securely to ensure that the fan is stable and safe.
- Locate the center of the ceiling where you want to install the fan. Use a level to make sure that the ceiling is level.
- Mark the location of the mounting bracket on the ceiling.
- Drill pilot holes for the screws.
- Screw the mounting bracket into the ceiling.
Connect the Electrical Wiring
Once the ceiling fan bracket is mounted, you can connect the electrical wiring to the fan. Make sure that the power to the room is still turned off.
- Strip about 1/2 inch of insulation from the ends of the wires.
- Twist the bare ends of the wires together with the corresponding wires on the fan. The black wire from the fan should be connected to the black wire from the ceiling, the white wire from the fan should be connected to the white wire from the ceiling, and the green or bare copper wire from the fan should be connected to the green or bare copper wire from the ceiling.
- Secure the wire connections with wire nuts.
Hang the Ceiling Fan
Once the electrical wiring is connected, you can hang the ceiling fan from the ceiling fan bracket.
- Carefully lift the ceiling fan up to the ceiling fan bracket.
- Align the mounting holes on the fan with the holes on the bracket.
- Insert the screws into the holes and tighten them until the fan is secure.
Install the Blades
The final step is to install the ceiling fan blades. The blades are typically attached to the fan motor with screws. Simply insert the screws into the holes on the blades and tighten them until the blades are secure.
Turn on the Power
Once the ceiling fan is installed, you can turn on the power at the circuit breaker panel. Test the fan to make sure that it is working properly.
Congratulations! You have now successfully installed a ceiling fan with existing wiring.

Wiring A Ceiling Fan And Light With Diagrams Ptr

Replacing A Ceiling Fan Light With Regular Fixture Jlc

Installing A Ceiling Fan Fine Homebuilding

Wiring A Ceiling Fan And Light With Diagrams Ptr

Installing A Ceiling Fan Fine Homebuilding

Wiring A Ceiling Fan And Light With Diagrams Ptr

How To Wire A Ceiling Fan For Separate Control Fo The And Light
Replacing A Ceiling Fan Light With Regular Fixture Jlc

Ceiling Fan Wiring Diagram Power Into Light

Installing A Ceiling Fan Using Existing Wiring
Related Posts


