How to Install a Light on a Ceiling Fan
Installing a light on a ceiling fan can add both illumination and style to any room. While the process may seem daunting, it's actually quite straightforward with the right tools and a bit of patience. Here's a comprehensive guide to help you through the process:
Gather the Necessary Materials
Before you begin, make sure you have the following materials on hand:
- Ceiling fan light kit
- Screwdriver (Phillips head and flathead)
- Wire strippers
- Electrical tape
- Ladder
Turn Off Power and Safety Precautions
Before working on any electrical components, it's crucial to ensure your safety by turning off the power supply to the ceiling fan. Refer to your electrical panel and locate the circuit breaker or fuse associated with the fan. Turn it off and double-check that the power is indeed cut off by attempting to operate the fan.
Remove the Old Light Fixture (If Applicable)
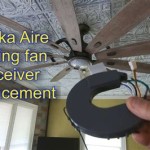
If your ceiling fan already has an existing light fixture, remove it by unscrewing the mounting screws holding it in place. Carefully disconnect the electrical wires by loosening the wire nuts and separating them. Ensure that you do not lose any of the components.
Assemble the New Light Fixture
Open the package of your new ceiling fan light kit and assemble it according to the manufacturer's instructions. Typically, this involves connecting the light sockets to the base plate and attaching the glass or plastic shade.
Attach the Light Fixture to the Ceiling Fan
Align the mounting plate of the light fixture with the ceiling fan's motor housing. Secure it with the provided screws, ensuring it is firm and level. Connect the electrical wires by matching the colors of the wires (e.g., black to black, white to white) and securing them with wire nuts. Cover the wire nuts with electrical tape for insulation.
Install the Light Bulbs
Insert the light bulbs into the sockets of the light fixture. Ensure that you use the correct wattage and type of bulbs specified by the manufacturer.
Restore Power and Test
Turn the power back on at the electrical panel. Operate the ceiling fan and light to confirm that everything is working correctly. If the light does not turn on, check the connections, ensure the bulbs are properly installed, and consult the manufacturer's instructions for troubleshooting.
Enjoy Your New Ceiling Fan Light
Congratulations! You have successfully installed a light on your ceiling fan. Not only will it provide illumination, but it will also enhance the overall aesthetic of your space. Remember to follow all safety precautions and enjoy the convenience and beauty of your upgraded ceiling fan.

Replacing A Ceiling Fan Light With Regular Fixture Jlc

Replacing A Ceiling Fan Light With Regular Fixture Jlc

4 Ways To Replace A Light Bulb In Ceiling Fan Wikihow

How To Add A Light Kit Your Ceiling Fan Mr Electric

How To Replace A Ceiling Fan With Pendant Light

How To Replace A Ceiling Fan With Pendant Light

Wiring A Ceiling Fan And Light With Diagrams Ptr

4 Ways To Replace A Light Bulb In Ceiling Fan Wikihow

How To Wire A Ceiling Fan Temecula Handyman

How To Replace A Ceiling Fan Light Kit Smafan Com
Related Posts