How to install recessed lighting fixthisbuildthat 8 installation tips for diyers bob vila like a pro our home made easy can lights the depot led on high ceiling 200 diy project in inium kitchen existing info ask this old house

How To Install Recessed Lighting Fixthisbuildthat

How To Install Recessed Lighting Fixthisbuildthat

8 Recessed Lighting Installation Tips For Diyers Bob Vila

How To Install Recessed Lighting Like A Pro Our Home Made Easy

How To Install Recessed Lighting Can Lights The Home Depot

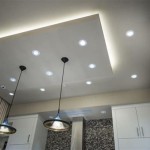
How To Install Led Recessed Lighting On High Ceiling A 200 Diy Project

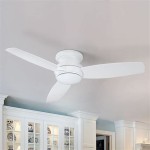
Recessed Lighting In A Inium Kitchen

How To Install Led Recessed Lighting In Existing Ceiling Info

How To Install Recessed Lighting Fixthisbuildthat

Recessed Lighting Installation Bob Vila

How To Install Recessed Lights Ask This Old House

How To Install New Work Recessed Lighting

How To Layout Recessed Lighting In 5 Simple Steps Tutor

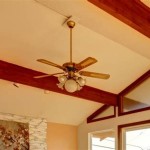
How To Put Recessed Lights In The Ceiling

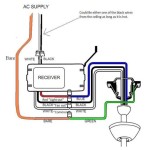
How To Run Wire For Recessed Lighting Led Info

Diy How To Install Recessed Lighting With No Housing Or J Boxes

Recessed Lighting Guide The Home Depot

Install Recessed Lighting

Paint Before Or After Electrical Renos 4 Pros Joes
How to install recessed lighting 8 installation tips like a can lights led on in inium kitchen bob vila ask