How to Install an Additional Ceiling Light
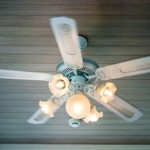
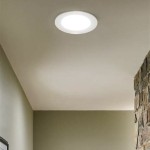
Adding an additional ceiling light can brighten up a room and improve its overall ambiance. Whether you're looking to illuminate a dark corner or create a more inviting atmosphere, installing a new light fixture is a relatively simple DIY project that can make a significant difference in your home.
Essential Tools and Materials
- New ceiling light fixture
- Screwdriver
- Wire cutters
- Electrical tape
- Junction box
- Mounting screws
- Wire nuts
- Safety glasses
Step-by-Step Instructions
1. Safety First
Before you begin, turn off the power to the circuit that controls the light fixture at your electrical panel. Wear safety glasses throughout the installation process.
2. Remove the Old Light Fixture (if applicable)
If you're replacing an existing light fixture, use a screwdriver to remove the mounting screws and carefully detach it from the ceiling. Disconnect the electrical wires by loosening the wire nuts and separating them.
3. Install the Junction Box
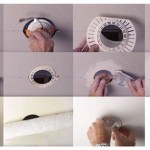
For a new installation, install a junction box to the ceiling according to the manufacturer's instructions. The junction box will provide a secure point of attachment for the new light fixture.
4. Prepare the Wires
Strip about 1/2 inch of insulation from the ends of the wires coming from the ceiling and from the new light fixture. Twist the bare ends of the wires of the same color together (black to black, white to white, and green or bare copper to green or bare copper).
5. Connect the Wires
Twist the wire nuts onto the connected wires until they are snug and secure. Wrap electrical tape tightly around the wire nuts for added protection.
6. Mount the Light Fixture
Carefully lift the light fixture onto the junction box and align the mounting holes. Secure the fixture to the box using the mounting screws provided.
7. Connect the Electrical Wires
Connect the electrical wires from the fixture to the wires in the junction box. Match the colors as before (black to black, white to white, and green or bare copper to green or bare copper) and twist the wire nuts together.
8. Restore Power and Test
Turn the power back on at the electrical panel. Flip the light switch to test the new fixture. If the light turns on and functions properly, the installation is complete.
Tips for Success
- Use a voltage tester to ensure that the wires are not live before removing the old light fixture.
- If the light fixture has multiple branches or arms, connect the wires for each branch separately before mounting the fixture.
- Make sure that all electrical connections are tight and secure to prevent electrical hazards.
- If you are not comfortable working with electricity, it is advisable to hire a qualified electrician to perform the installation.

How To Install Ceiling Light Homeserve Usa

How To Install A Ceiling Light Fixture Diy Family Handyman

Mounting Light Fixtures Fine Homebuilding

How To Replace Install A Light Fixture The Art Of Manliness

How To Install A Lighting Fixture Forbes Home

How To Install A Ceiling Light Fixture Diy Family Handyman

6 Steps How To Install Led Strip Lights On Ceiling

Replace Recessed Light With A Pendant Fixture

Adding An Extra Light From A Switch

How To Install A Ceiling Light Fixture Diy Family Handyman
Related Posts

