How to Effortlessly Install Built-In Ceiling Lights
Installing built-in ceiling lights can elevate the ambiance of your home, enhancing both functionality and aesthetics. Whether you're a seasoned DIY enthusiast or a novice eager to tackle a new project, this comprehensive guide will empower you with the knowledge and steps to successfully install built-in ceiling lights in your own home.
1. Safety First: Gather Necessary Tools and Materials
Before embarking on your installation journey, it's crucial to prioritize safety by gathering the essential tools and materials. These include:
- Safety goggles and gloves
- Electrical tester
- Screwdriver
- Drill with appropriate drill bits
- Jig saw or hole saw
- Junction box
- Ceiling light fixture
- Electrical wire (14 or 12 gauge)
- Wire nuts
- Insulation
2. Electrical Expertise: Turn Off Power and Verify Wiring
Before handling any electrical components, ensure your safety by turning off the power at the breaker panel. Use an electrical tester to confirm that the circuit is indeed de-energized.
Next, inspect the ceiling to identify the location of the electrical wiring. You may need to cut a small hole in the ceiling to access the wiring and junction box.
3. Precision Cutting: Create a Hole for the Junction Box
Using a jig saw or hole saw, carefully cut a hole in the ceiling large enough to accommodate the junction box. Ensure the hole is centered in the desired location for your light fixture.
Feed the wires from the ceiling through the hole and into the junction box. Secure the junction box in place using the provided screws.
4. Electrical Connections: Wiring the Fixture
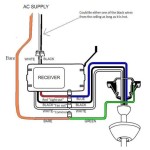
Refer to the fixture's wiring diagram for specific instructions on connecting the wires. Generally, the black wire should be connected to the hot wire, the white wire to the neutral wire, and the green or bare copper wire to the ground wire.
Secure the wire connections using wire nuts and insulation. Tuck the excess wire neatly into the junction box.
5. Finishing Touches: Installing the Fixture
With the electrical connections complete, you can now mount the ceiling light fixture to the junction box. Align the fixture with the holes in the mounting bracket and secure it using the provided screws.
Finally, replace the cover plate on the fixture and turn on the power at the breaker panel. Bask in the illuminating ambiance of your newly installed built-in ceiling lights.

How To Install Led Flat Panel Light Ox Lighting

How To Install Recessed Lighting Fixthisbuildthat

8 Recessed Lighting Installation Tips For Diyers Bob Vila

How To Install Low Profile Led Lights In Your Kitchen Diy Family Handyman

How To Install Recessed Lights In A Drop Ceiling The Home Depot

How To Install Recessed Lighting The Home Depot

Installing Recessed Lighting For Dramatic Effect Diy Family Handyman

How To Install Led Strip Lights On The Ceiling Lighting Info

How To Put Recessed Lights In The Ceiling

How To Install Recessed Lighting Fixthisbuildthat
Related Posts


