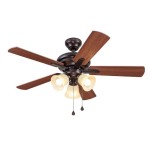
How To Install Ceiling Fan Universal Remote: A Step-by-Step Guide
Ceiling fans are a great way to circulate air and keep your home cool and comfortable. But what if your ceiling fan doesn't have a remote control? Or what if the remote control is lost or damaged? In this case, you can install a universal ceiling fan remote control. Universal ceiling fan remote controls are designed to work with most ceiling fans, regardless of the make or model. They are relatively easy to install and can be a great way to add convenience to your home.
Here is a step-by-step guide on how to install a ceiling fan universal remote control:
Step 1: Gather the necessary materials
You will need the following materials to install a ceiling fan universal remote control:
- Universal ceiling fan remote control
- Screwdriver
- Electrical tape
- Wire nuts
Step 2: Turn off the power to the ceiling fan
Before you begin working on the ceiling fan, it is important to turn off the power at the circuit breaker. This will help to prevent electrical shock.
Step 3: Remove the canopy from the ceiling fan
The canopy is the cover that is located at the top of the ceiling fan. It is usually held in place by a few screws. Remove the screws and carefully lift the canopy off of the ceiling fan.
Step 4: Locate the wiring for the ceiling fan
Once you have removed the canopy, you will see the wiring for the ceiling fan. There will be three wires: a black wire, a white wire, and a ground wire (usually green or bare copper).
Step 5: Connect the wiring from the universal ceiling fan remote control to the wiring for the ceiling fan
Connect the black wire from the universal ceiling fan remote control to the black wire from the ceiling fan. Connect the white wire from the universal ceiling fan remote control to the white wire from the ceiling fan. Connect the ground wire from the universal ceiling fan remote control to the ground wire from the ceiling fan. Use wire nuts to secure the connections.
Step 6: Mount the universal ceiling fan remote control
Mount the universal ceiling fan remote control to the ceiling or wall using the screws that came with the remote control. Make sure that the remote control is within reach of the ceiling fan.
Step 7: Test the universal ceiling fan remote control
Turn on the power to the ceiling fan and test the remote control. The remote control should be able to turn the ceiling fan on and off, as well as adjust the fan speed.
Step 8: Reattach the canopy to the ceiling fan
Reattach the canopy to the ceiling fan and secure it with the screws. Your ceiling fan is now ready to use with the universal remote control.
Installing a universal ceiling fan remote control is a relatively easy project that can be completed in about 30 minutes. By following these steps, you can add convenience and style to your home.
Universal Ceiling Fan Remote Replacement Ifixit Repair Guide

Universal Ceiling Fan And Light Remote Control Kit Add A No In Wall Wiring Required Switch Sd Timming On Off Scene With Receiver Plate

How To Install A Ceiling Fan Remote Diy Family Handyman

How To Wire A Ceiling Fan Control Using Dimmer Switch

How Do I Install New Hunter Ceiling Fan With Remote Control And Still Have Switch Wall For The Light Separately R Homemaintenance

Converting An Existing Ceiling Fan To A Remote Control

Universal Ceiling Fan Remote Control Kit 3in1 Light Timing Sd Rem 614591973102

Universal Ceiling Fan Remote Control Kit Replacement For Harbor Breeze Hunter Hampton Bay Litex 3 Sd Light Dimmer With Receiver Fan28r Replace 53t 2aazpfan 11t Kujce9103 Uc7030t Com

Hampton Bay Universal Smart Wi Fi 4 Sd Ceiling Fan White Remote Control For Use Only With Ac Motor Fans Powered By Hubspace 76278 The Home Depot

On Off Handheld Remote With Receiver 99772 Hunter Fan
Related Posts


