How to Install a Ceiling Fixture: A Comprehensive Guide
Installing a ceiling fixture can be a rewarding DIY project that enhances the aesthetics and functionality of your home. Whether you're replacing an existing fixture or adding a new one, it's essential to approach the task with the right information and techniques. This guide will provide a step-by-step walkthrough of the installation process, ensuring a safe and successful outcome.
1. Safety First
Before starting, remember to prioritize safety. Turn off the power to the circuit that supplies the ceiling fixture using the breaker or fuse box. This crucial step prevents electrical shocks and potential hazards.
2. Gather Necessary Tools and Materials
To install the ceiling fixture, you'll need the following tools and materials: - Ceiling fixture - Electrical wire nuts - Screwdriver - Wire strippers - Voltage tester - Electrical tape (optional) - Safety glasses (recommended)
3. Remove the Existing Fixture (if any)
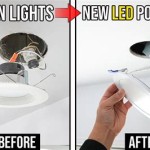
If you're replacing an existing ceiling fixture, it needs to be removed first. Unhook the fixture from the ceiling by removing the mounting screws and carefully detaching the wires. Label the wires for easier reconnection later.
4. Prepare the Wires
Using wire strippers, remove about 1/2 inch of insulation from the ends of the wires. Twist the exposed copper wires clockwise to create a secure connection. If desired, apply electrical tape to the wire connections for added insulation.
5. Connect the Fixture to the Wires
Match the black wire from the fixture to the black wire from the ceiling, and the white wire from the fixture to the white wire from the ceiling. Connect the ground wire (usually green or bare copper) to the ground wire from the ceiling.
Use wire nuts to secure the connections. Twist the wire nuts clockwise until they are tight. Ensure that all connections are snug and insulated.
6. Mount the Fixture
Depending on the type of fixture and mounting mechanism, attach the fixture to the ceiling junction box. This may involve screws, bolts, or a mounting plate. Tighten the mounting hardware securely.
7. Install the Fixture Cover
Slide the fixture cover over the fixture base and secure it with screws or clips. Some fixtures may require additional steps, such as attaching a diffuser or shade.
8. Restore Power and Test the Fixture
Once the fixture is installed, restore power to the circuit and turn on the light switch. Verify that the fixture is working correctly and that there are no visible sparks or unusual noises.
Congratulations! You have successfully installed your ceiling fixture. Enjoy the enhanced illumination and ambiance it brings to your space.
Tips for a Successful Installation
- Always refer to the manufacturer's instructions for specific fixture requirements. - Use a voltage tester to confirm that the wires are not live before starting any work. - Ensure that all wire connections are tight and insulated to prevent electrical hazards. - If you encounter any difficulties or uncertainties, do not hesitate to consult with a qualified electrician for assistance.
With careful planning and attention to safety, you can confidently install a ceiling fixture and brighten up your home with your own hands.

Mounting Light Fixtures Fine Homebuilding

How To Install A Ceiling Light Fixture Diy Family Handyman

How To Install Ceiling Light Homeserve Usa

How To Install A Ceiling Light Fixture Diy Family Handyman

How To Replace Install A Light Fixture The Art Of Manliness

How To Install A Vintage Ceiling Light Fixture Simple Decorating Tips

How To Install A Light Fixture Diy Home Improvement

How To Install A Light Fixture 10 Steps With Pictures Wikihow

Adding Light How To Install A Fixture Diy

How To Replace Install A Light Fixture The Art Of Manliness
Related Posts


