How to Install a Ceiling Hanging Light
Adding a ceiling hanging light to your home can be a great way to improve the ambiance and style of a room. It can also be a relatively easy project to complete yourself, even if you're not a professional electrician.
Here are the essential steps involved in installing a ceiling hanging light:
1. Gather Your Materials and Tools
Before you begin, make sure you have all the necessary materials and tools. You will need:
- A new ceiling hanging light
- Electrical wire (if not included with the light)
- Wire nuts
- Screwdriver
- Drill
- Safety glasses
2. Safety First
Before you start any electrical work, it is important to turn off the power to the circuit that you will be working on. You can do this by flipping the breaker or removing the fuse. Once the power is off, put on your safety glasses.
3. Remove the Old Light (if necessary)
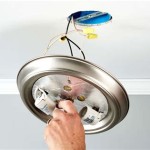
If you are replacing an existing ceiling hanging light, you will need to remove it before you can install the new one. To do this, simply unscrew the nuts that hold the light in place and disconnect the wires.
4. Install the Mounting Bracket
Most ceiling hanging lights come with a mounting bracket that needs to be installed on the ceiling. This bracket will support the weight of the light. To install the bracket, hold it up to the ceiling and mark the location of the mounting holes. Then, drill pilot holes at the marked locations and insert the screws. It is important to ensure that the bracket is securely fastened.
5. Connect the Wires
Once the mounting bracket is installed, you need to connect the wires from the light to the wires in the ceiling. The wires are typically color-coded, with black being the hot wire, white being the neutral wire, and green or bare copper being the ground wire. Connect the black wire from the light to the black wire in the ceiling, the white wire from the light to the white wire in the ceiling, and the green or bare copper wire from the light to the ground wire in the ceiling. Twist the ends of the wires together and secure them with wire nuts.
6. Hang the Light
Now it's time to hang the light. Lift the light up to the mounting bracket and align the holes. Insert the screws and tighten them until the light is securely in place. Make sure the light is level and that it is hanging at the desired height.
7. Restore Power
Once the light is installed, you can restore power to the circuit. Flip the breaker back on or replace the fuse. The light should now be working properly.
Installing a ceiling hanging light is a relatively easy project that can add a touch of style and elegance to any room. By following these steps, you can safely and easily install a ceiling hanging light in your home.

How To Hang Lights From A Ceiling 13 Steps With Pictures
:max_bytes(150000):strip_icc()/installing-a-pendant-light-2175009-01-ed4c5a36391942b683ab0a5e7b5361b9.jpg?strip=all)
How To Install A Pendant Light

How To Install Pendant Lights Homeserve Usa

Pendant Light Solutions Guide Upshine Lighting

How To Install A Pendant Light Diy Family Handyman

How To Install A Pendant Light Simple Step By Guide

How To Hang Lights From A Ceiling 13 Steps With Pictures

How To Install A Pendant Light Diy Family Handyman

How To Hang Pendant Lights 9 Inventive Ideas Bob Vila

How To Install A Hanging Light Fixture The Home Depot
Related Posts


