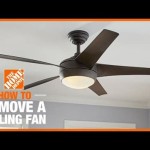
How to Install a Commercial Electric Ceiling Fan Support Box with Brace Kit
Installing a ceiling fan support box with a brace kit is an essential step in ensuring the safe and secure installation of a ceiling fan. The support box provides a sturdy base for the fan, while the brace kit helps to distribute the weight of the fan and prevent it from swaying or wobbling. This article will provide a step-by-step guide on how to install a commercial electric ceiling fan support box with a brace kit.
Before you begin, it is important to gather the necessary tools and materials. You will need a drill, a screwdriver, a level, a tape measure, a pencil, a stud finder, and a ceiling fan support box with a brace kit. Once you have all of your tools and materials, you can begin the installation process.
Step 1: Determine the Location of the Support Box
The first step is to determine the location of the support box. The support box should be installed at the center of the ceiling, where the fan will be hung. You can use a stud finder to locate the joists in the ceiling. Once you have found the joists, you can mark the center of the ceiling with a pencil.
Step 2: Drill a Hole for the Support Box
Once you have marked the center of the ceiling, you can drill a hole for the support box. The hole should be large enough to fit the support box snugly. You can use a drill bit that is slightly smaller than the diameter of the support box. Once you have drilled the hole, you can insert the support box into the hole.
Step 3: Secure the Support Box
Once the support box is in place, you need to secure it to the joists. You can do this by using the screws that came with the support box. Drive the screws through the holes in the support box and into the joists. Make sure that the support box is securely fastened to the joists.
Step 4: Install the Brace Kit
The next step is to install the brace kit. The brace kit consists of two metal brackets that are attached to the support box. The brackets help to distribute the weight of the fan and prevent it from swaying or wobbling. To install the brace kit, simply attach the brackets to the support box using the bolts that came with the kit.
Step 5: Install the Ceiling Fan
Once the brace kit is installed, you can install the ceiling fan. To do this, simply attach the fan to the support box using the bolts that came with the fan. Make sure that the fan is securely fastened to the support box.
Step 6: Turn on the Power
Once the fan is installed, you can turn on the power. The fan should start running smoothly. If the fan is not running smoothly, check the connections to make sure that they are secure.
Conclusion
Installing a commercial electric ceiling fan support box with a brace kit is a relatively simple process. By following the steps in this article, you can ensure that your ceiling fan is installed safely and securely.

How To Install A Ceiling Fan Mount Bracket Electric Box

Commercial Electric Ceiling Fan Support Box W Brace Kit 16 24 Span 1 5 Deep

Commercial Electric 4 In Round 2 1 8 Deep 21 5 Cu Metallic Ceiling Fan Light Fixture Box And Brace Kit For Suspended Ceilings Cmb218 Sc The Home Depot

Commercial Electric 4 In Round 1 2 Deep 15 3 Cu Metallic Ceiling Fan Light Fixture Box And Brace Kit For New Work Cmb150 Nb The Home Depot

Commercial Electric Ceiling Fan Support Box W Brace Kit 16 24 Span 1 5 Deep

Fan Support Boxes 2 1 8 Deep With Sidemount

Raco 1 Gang Steel New Work Standard Ceiling Fan Electrical Box Gray

Commercial Electric Ceiling Fan Support Box W Brace Kit 16 24 Span 1 5 Deep

Commercial Electric 4 In Round 1 2 Deep 15 3 Cu Metallic Ceiling Fan Light Fixture Box And Brace Kit For New Work Cmb150 Nb The Home Depot

Commercial Electric 4 In Round 2 1 8 Deep 21 5 Cu Metallic Ceiling Fan Light Fixture Box And Brace Kit For Old New Work Cmb218 Ob The Home Depot
Related Posts