How to Install a Flush Mount Ceiling Fixture
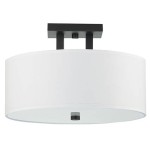
Flush mount ceiling fixtures are a popular choice for illuminating both residential and commercial spaces. They are relatively easy to install, and they can provide ample light while taking up minimal space. If you're considering installing a flush mount ceiling fixture, here are the essential steps you need to follow:
1. Gather Your Materials
Before you begin, you will need to gather the following materials:
- Flush mount ceiling fixture
- Screwdriver
- Drill
- Wire cutters
- Electrical tape
- Safety glasses
2. Safety First
Before you start working on the electrical system, it is important to turn off the power to the circuit that you will be working on. You can do this by flipping the breaker or removing the fuse for that circuit. Once the power is off, put on your safety glasses.
3. Remove the Old Fixture (if applicable)
If you are replacing an existing flush mount ceiling fixture, you will need to remove it before you can install the new one. To do this, simply unscrew the screws that are holding the fixture in place and disconnect the wires. Once the old fixture is removed, you can proceed to the next step.
4. Mount the Fixture Base
The first step in installing the new flush mount ceiling fixture is to mount the fixture base to the ceiling. The fixture base is the part of the fixture that will be attached to the electrical box in the ceiling. To mount the fixture base, simply hold it up to the electrical box and screw it into place.
5. Connect the Wires
Once the fixture base is mounted, you will need to connect the wires from the fixture to the wires in the electrical box. To do this, simply match the colors of the wires and twist them together. Then, secure the connections with electrical tape.
6. Install the Fixture
Once the wires are connected, you can install the fixture to the fixture base. To do this, simply lift the fixture into place and twist it until it locks into place.
7. Turn on the Power
Once the fixture is installed, you can turn on the power to the circuit and test the fixture to make sure that it is working properly.
Additional Tips
Here are a few additional tips to help you install a flush mount ceiling fixture:
- If you are not comfortable working with electricity, it is best to hire a qualified electrician to install the fixture for you.
- Make sure that the fixture is rated for the type of ceiling that you have.
- Follow the manufacturer's instructions carefully.
- Be sure to wear safety glasses when working on the electrical system.

Light Fixture Flush Mount Installation Wattco Electric

How To Install Flush Mount Ceiling Lights

How To Install Flush And Semi Mount Lighting The Home Depot

Mingbright 14 Inch Led Flush Mount Ceiling Light Fixture Dimmable Lamps For Hallway Bathroom Or Kitchen Damp Location Lamp 3000k Warm White Cetl Listed Com

The Ultimate Flush Ceiling Light Installation And Guide 21 22 Fancy Place

How To Install Modern Ceiling Light Cover Conversion Kits

How To Install Flush And Semi Mount Lighting The Home Depot

15w Led Recessed Mount Ceiling Lights 5000k Daylight White Waterproof 1250lm Le

How To Install A Semi Flush Mount Ceiling Light

Led Flush Mount Ceiling Light Fixture 12 Inch 24w 3200lm 4000k Neutr Freeamzs
Related Posts

