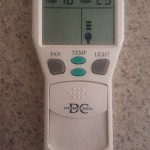
How to Install Hampton Bay Ceiling Fan Remote
Installing a Hampton Bay ceiling fan remote can enhance the convenience and functionality of your ceiling fan. The remote allows you to control the fan's speed, light, and other features from anywhere in the room. Understanding the various aspects of the installation process can ensure a successful outcome. This article will provide a comprehensive guide on how to install a Hampton Bay ceiling fan remote, covering the essential steps and considerations.
Determining the Right Remote Kit
Before starting the installation, it's crucial to identify the correct remote kit compatible with your Hampton Bay ceiling fan. Check the model number of your fan and consult the manufacturer's website or user manual. The specific remote kit required may vary depending on the fan model and features you want to control.
Safety Precautions
Before beginning the installation, ensure power is turned off at the circuit breaker to prevent accidental electrical shocks. Also, use a sturdy ladder for safe access to the ceiling and wear gloves for hand protection.
Preparing the Ceiling Fan
Locate the receiver module on the ceiling fan body. It typically has wires with connectors labeled for light and fan. Disconnect the existing wires from the receiver module by pressing the release tabs on the connectors. If your fan doesn't have a receiver module, skip this step and proceed to the remote receiver installation section.
Installing the Remote Receiver (If Needed)
If your ceiling fan doesn't have a built-in receiver module, you'll need to install one. Connect the wires from the ceiling fan motor and light to the corresponding terminals on the receiver module. Ensure the wires are securely connected and the connectors are snapped into place.
Connecting the Remote Receiver (If Already Installed)
Align the connectors on the remote receiver with the corresponding terminals on the ceiling fan and firmly push them together until they snap into place. If the wires are not long enough, you may need to use wire nuts to extend them.
Installing the Remote Control Battery
Open the battery compartment of the remote control and insert the battery as per the polarity markings. Ensure the battery is securely placed and the compartment is closed properly.
Testing the Remote
Restore power to the circuit breaker and turn on the ceiling fan. Use the remote to control the fan's speed, light, and any additional features. Ensure all functions are working as intended.
Conclusion
Installing a Hampton Bay ceiling fan remote is a straightforward process that can significantly enhance the functionality and convenience of your ceiling fan. By following these steps and considering the essential aspects highlighted in this article, you can successfully install the remote and enjoy its benefits.

Troubleshooting Your Remote Controls Step By Ceiling Fans Lighting

Hampton Bay 70830 Instructions Assembly Manualzz

Troubleshooting Your Remote Controls Step By Ceiling Fans Lighting

Solved Remote Works Fine But The Fan Does Not No Light Fixya

Hampton Bay Riley 44 In Indoor Led Broe Dry Rated Downrod Ceiling Fan With 5 Reversible Blades Light Kit And Remote Control 52141 The Home Depot

Hampton Bay Ceiling Fan 5 Blades 4 Lights Remote Control Light Dimmer Model Hd Fcc Id Lshbay97fanhd Receiver

Hampton Bay 98001 3 Sd Universal Ceiling Fan Thermostatic Remote Control With Lcd Display

Hampton Bay Ceiling Fan Only Going In Clockwise Will Not Switch To Counterclockwise R Fixit

Ceiling Fan Remote Control Replacement For Hampton Bay Uc7078t With Light Dimmer

Hampton Bay Hollis 52 In Indoor Led Matte White Dry Rated Ceiling Fan With 5 Reversible Blades Light Kit And Remote Control 52198 The Home Depot
Related Posts


