How to Install a Light Fixture in a Suspended Ceiling
Suspended ceilings, also known as drop ceilings, are a common feature in commercial and institutional buildings. They offer several advantages, including the ability to conceal unsightly wires and pipes, provide easy access to utilities, and improve acoustics. Installing a light fixture in a suspended ceiling is a relatively straightforward process that can be completed in a few steps.
Safety Precautions
Before beginning any electrical work, it is important to take safety precautions. Ensure that the power to the circuit is turned off at the breaker panel. Test the circuit with a non-contact voltage tester to confirm that there is no power. Wear safety glasses and gloves to protect yourself from debris and electrical shock.
Materials and Tools Required
* New light fixture * Mounting bracket (if required) * Electrical wire connectors * Wire strippers * Screwdriver * Drill (if installing a new mounting bracket) * Level (optional)Step 1: Remove the Existing Light Fixture
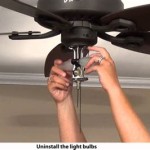
Locate the existing light fixture and remove the screws or clips that hold it in place. Carefully lower the fixture and disconnect the electrical wires. If the fixture has a mounting bracket, remove it from the ceiling as well.
Step 2: Install the Mounting Bracket
If the new light fixture does not come with its own mounting bracket, you will need to install one. Hold the bracket in place against the ceiling and mark the location of the screw holes. Drill pilot holes at the marked locations and insert screws to secure the bracket.
Step 3: Connect the Electrical Wires
Strip about 1/2 inch of insulation from the ends of the electrical wires. Twist the exposed copper wires together for each pair (black to black, white to white, and green to green). Secure the connections with electrical wire connectors.
Step 4: Mount the Light Fixture
Align the new light fixture with the mounting bracket and lift it into place. Secure the fixture by tightening the screws or clips. If desired, use a level to ensure that the fixture is level.
Step 5: Restore Power and Test
Turn on the power at the breaker panel. Test the light fixture to ensure that it is working properly. If the light does not turn on, check the electrical connections to make sure they are secure.
Tips
* Choose a light fixture that is the appropriate size and style for your suspended ceiling. * Use a mounting bracket that is compatible with the weight of the light fixture. * If you are not comfortable working with electricity, consult with a qualified electrician for assistance.
Installing Flush Mount Llight Fixture Into Drop Ceiling Refinish Paint House Remodeling Decorating Construction Energy Use Kitchen Bathroom Bedroom Building Rooms City Data Forum

Install Lighting In A Suspended Ceiling Doityourself Com

Drywall Suspended Grid Showroom Ceiling Systems How To Install Pictures Of Tips For Installing Drop Ceilings Strictly Racine Wisconsin

Installing Lights Fans Ventilators In Suspended Ceilings

Installing Lights Fans Ventilators In Suspended Ceilings

How To Install Lighting In Your Ceiling Kanopi By Armstrong

How To Replace A Drop Ceiling The Lilypad Cottage

The Best Lights To Put In A Suspended Ceiling Hunker

Drop Ceiling Tiles Installation Tips Diy Family Handyman

Drop Ceiling Installation How To Install A Homeserve Usa
Related Posts