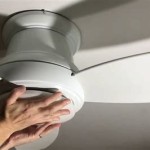
How to Install a Light Kit Ceiling Fan: A Step-by-Step Guide
Installing a light kit ceiling fan can be a challenging task, but with careful planning and execution, it can be completed successfully. This guide will provide you with the essential steps involved in the process, ensuring a safe and functional installation.
Materials Required:- Light kit ceiling fan
- Screwdriver
- Wire strippers
- Electrical tape
- Ladder
Before beginning the installation, ensure that all electrical power is turned off at the breaker panel. Use a voltage tester to confirm that the power is indeed off.
Step 1: Assembly and PreparationGather all the components of the fan and the light kit. Assemble the fan according to the manufacturer's instructions. Connect the light kit to the fan, following the provided wiring diagram.
Step 2: Mount the Ceiling BracketLocate the junction box on the ceiling and secure the ceiling bracket to it using the provided screws. Ensure that the bracket is level and firmly attached.
Step 3: Electrical WiringConnect the wires from the ceiling box to the wires on the fan and light kit. Match the colors of the wires: black to black, white to white, and green (or bare) to green. Use wire strippers to remove approximately 1/2 inch of insulation from the ends of the wires, and twist them together securely. Connect the wires using electrical tape, wrapping tightly around the connections.
Step 4: Hang the FanLift the fan up and slide it onto the mounting bracket. Secure the fan using the locking bolts or screws provided in the kit.
Step 5: Wire the Light KitConnect the wires from the light kit to the wires on the fan. Match the colors of the wires: black to black, white to white. Use wire strippers, twist the wires together, and secure them with electrical tape.
Step 6: Install the Light FixtureAttach the light fixture to the fan by following the manufacturer's instructions. Securely fasten the fixture using the provided screws.
Step 7: Install the BladesSlide the fan blades onto the motor hub. Secure them using the screws provided. Ensure that the blades are installed securely and are facing the correct direction.
Step 8: Power On and CheckTurn on the electrical power at the breaker panel. Ensure that the fan and light are working properly. Check for any loose connections or unusual noises.
Tips:- Refer to the manufacturer's instructions for specific details and safety guidelines.
- If you are uncomfortable with any aspect of the installation, seek professional help from a licensed electrician.
- Ensure that the junction box is rated to support the weight of the fan.
- Use a ladder that is tall enough for you to reach the ceiling safely.
Installing a light kit ceiling fan can enhance the functionality and aesthetics of your living space. By following these steps carefully and taking necessary safety precautions, you can successfully complete the installation process and enjoy the benefits of a well-lit and comfortable room.

Ceiling Fan Light Kit Installation How To

How To Replace A Ceiling Fan Light Kit Smafan Com

How To Install A Ceiling Fan Light Kit Shockley Electric

How To Add A Light Kit Your Ceiling Fan Mr Electric

How To Install A Light On Ceiling Fan 11 Steps

Wiring A Ceiling Fan And Light With Diagrams Ptr

How To Install A Ceiling Fan With Light Girl S Guide Home Diy

Home Decorators Collection Merwry 52 In Integrated Led Indoor Matte Black Ceiling Fan With Light Kit And Remote Control Sw1422mbk The Depot

How To Install A Multi Light Kit On Your Hunter Ceiling Fan 5x Seri R Ceilingfans

Installation Instructions For Hunter Ceiling Fan
Related Posts


