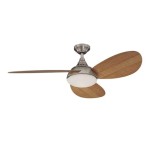
How to Effortlessly Install a Light Kit on Your Existing Ceiling Fan
Upgrading your ceiling fan with a light kit can transform your space, adding both illumination and style. Whether you're a novice or an experienced DIYer, this comprehensive guide will walk you through the essential steps to ensure a safe and successful installation.
Step 1: Gather Materials and Safety Precautions
Before you begin, gather the necessary materials, including the light kit compatible with your fan model, a screwdriver, wire nuts, and a ladder. For safety, turn off the power at the circuit breaker and ensure the fan is completely still before proceeding.
Step 2: Dismantle the Fan Blades and Canopy
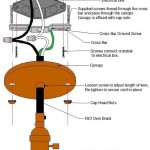
Carefully remove the fan blades by unscrewing the screws securing them to the motor. Next, detach the canopy, the decorative cover at the fan's base, by unscrewing the central bolt.
Step 3: Prepare the Electrical Wires
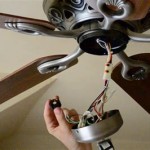
Locate the wire nuts used to connect the fan's wires to the electrical wires in the ceiling. Disconnect these wire nuts and extend the wires sufficiently to accommodate the light kit.
Step 4: Install the Light Kit Bracket
The light kit bracket typically mounts to the fan's motor housing. Align the bracket with the holes on the housing and secure it with screws.
Step 5: Connect the Light Kit Wires
Match the wires from the light kit with the corresponding wires from the ceiling and fan. Connect them using wire nuts, ensuring a secure connection.
Step 6: Mount the Light Kit
Carefully lift the light kit onto the bracket, ensuring proper alignment. Secure the light kit with screws.
Step 7: Install the Glass Globe or Shade
The glass globe or shade typically snaps into place over the light kit. Gently insert it and rotate it until it locks securely.
Step 8: Reassemble the Fan
Reattach the canopy to the fan and tighten the central bolt. Reinstall the fan blades by aligning their slots onto the screws and tightening them securely.
Step 9: Restore Power and Test
Turn on the power at the circuit breaker and switch on the fan to ensure it operates correctly and the light kit illuminates properly.
Additional Tips:
- If you encounter any difficulties, consult the manufacturer's instructions or seek professional assistance.
- Always ensure electrical connections are tight and insulated for safety.
- Choose a light kit compatible with your fan model to avoid compatibility issues.
- Regularly clean and maintain the light kit to enhance its longevity.

How To Add A Light Kit Your Ceiling Fan Mr Electric

Ceiling Fan Light Kit Installation How To

How To Install A Light On Ceiling Fan 11 Steps

How To Install A Light On Ceiling Fan 11 Steps

How To Install A Light On Ceiling Fan 11 Steps

Wiring A Ceiling Fan And Light With Diagrams Ptr

How To Update A Ceiling Fan Without Removing It Savvy Apron

Home Decorators Collection Merwry 52 In Integrated Led Indoor Matte Black Ceiling Fan With Light Kit And Remote Control Sw1422mbk The Depot

How To For A Ceiling Fan Reviews By Wirecutter

How To Update A Ceiling Fan Without Removing It Savvy Apron
Related Posts

