How to Install Light on Plaster Ceiling: Essential Aspects
Installing lights on a plaster ceiling requires careful consideration of several essential aspects. Proper planning and execution are crucial to ensure safety, functionality, and aesthetic appeal. This article will delve into these key elements, providing comprehensive guidance for a successful light installation process.
1. Safety Precautions
Before beginning any electrical work, it is imperative to observe safety protocols. Wear appropriate protective gear, such as gloves and safety glasses. Ensure that the power source is turned off at the breaker panel. Use a non-contact voltage tester to verify that no electricity is present in the wires before making any connections.
2. Fixture Selection
The type of light fixture chosen should be compatible with the size and style of the room. Consider the amount of light output desired and the ambiance aimed for. Choose fixtures designed for plaster ceilings, as they often require specific mounting methods and support.
3. Wiring and Electrical Connections
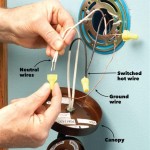
Proper wiring is essential for the safe and reliable operation of the light. Use appropriate wire gauge and secure the wiring using electrical tape or wire nuts. Follow the fixture's instructions for making electrical connections, ensuring a snug fit and proper insulation.
4. Box Installation
A junction box or ceiling fan support box is typically required to mount the light fixture safely. Trace the location of the light and cut a hole in the plaster ceiling using a dry saw or plaster knife. Install the box flush to the ceiling, securing it using screws or brackets.
5. Mounting the Fixture
Mount the light fixture to the junction box or support box according to the manufacturer's instructions. Use appropriate screws or bolts, and ensure the fixture is securely fastened to the ceiling. Adjust the height of the fixture as desired.
6. Patching and Painting
If any plaster damage occurs during installation, it should be patched and painted to restore the ceiling's original appearance. Use a patching compound suitable for plaster and follow the manufacturer's instructions.
7. Testing and Troubleshooting
Once the light is installed, turn on the power and test its functionality. Inspect the connections and wiring for any issues. If any problems arise, consult an electrician for assistance.
Conclusion
Installing lights on a plaster ceiling involves meticulous attention to safety, fixture selection, wiring, and mounting. By following these essential aspects, homeowners can achieve a successful installation that meets their lighting and aesthetic needs. If any complexities arise, consulting with a qualified electrician is advisable for safe and optimal results.

How To Install Ceiling Light Homeserve Usa

How To Install A Ceiling Medallion House Of Hipsters

How To Install Our Ceiling Roses Authentic Additions

Fixing Light Fittings To Victorian Ceiling Roses Houzz

How To Install The Led Strip Light On Ceiling

Plaster In Profile For Wall And Ceilings

Plaster In Led Strip Profile For Ceiling Edges

How To Fit A Ceiling Rose Installation Tips

Ceiling Shadow Gap With Led Lighting Page 1 Homes Gardens And Diy Pistonheads

How I Transformed My Bedroom Ceiling With Shiplap Liveabode
Related Posts

