How To Install Lights In A Drop Ceiling: Essential Aspects
Installing lights in a drop ceiling requires careful planning and execution to ensure a professional-looking and functional result. Understanding the essential aspects of the process, such as preparation, fixture selection, wiring, and safety precautions, is crucial for a successful installation.
In this article, we will delve into the essential steps involved in installing lights in a drop ceiling, providing guidance and tips for a safe and efficient process. From gathering the necessary tools and materials to connecting the lights to the power source, we will cover the key aspects that will help you achieve a well-lit and visually appealing ceiling.
1. Preparation: Choosing the Right Fixtures and Planning the Layout
Before starting the installation, it is essential to choose the appropriate light fixtures for your drop ceiling. Consider the size, shape, and style of the room, as well as the desired light output and ambiance. Plan the layout of the lights to ensure even illumination and avoid shadows or dark spots.
2. Safety Precautions: Working with Electricity
When working with electricity, safety is paramount. Turn off the power at the main breaker panel before starting any electrical work. Use insulated tools and wear gloves to protect yourself from electrical shocks. If you are not comfortable working with electricity, consult a qualified electrician for assistance.
3. Installing the Lights: Connecting Fixtures to the Ceiling Grid
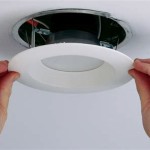
Once the light fixtures are selected and the safety precautions are observed, the next step is to install the lights in the drop ceiling grid. This typically involves lifting the ceiling tiles and connecting the light fixture mounting brackets to the grid. Secure the lights according to the manufacturer's instructions.
4. Wiring: Connecting the Lights to the Power Source
The electrical wiring is a crucial aspect of the installation. Connect the wires from the light fixtures to the power source using wire nuts. Ensure that the connections are tight and secure. Double-check the wiring before turning on the power to prevent electrical hazards.
5. Finishing Touches: Testing the Lights and Replacing the Ceiling Tiles
After wiring the lights, test them to ensure they are functioning correctly. Replace the ceiling tiles and adjust the lights as needed. Inspect the finished installation for any loose connections or potential hazards. By following these steps and paying attention to the essential aspects, you can successfully install lights in a drop ceiling and enhance the ambiance and functionality of your space.
Installing lights in a drop ceiling is a manageable task that can greatly improve the aesthetics and functionality of a room. By understanding the key aspects, such as preparation, safety, and wiring, you can ensure a successful and safe installation. If you have any doubts or encounter any difficulties, do not hesitate to seek professional assistance to complete the project.

How To Install Recessed Lights In A Drop Ceiling Temecula Handyman

Diy Recessed Lighting Installation In A Drop Ceiling Tiles Part 3 Super Nova Adventures

Install Lighting In A Suspended Ceiling Doityourself Com

Installing Woodhaven Planks And Hiding Drop Ceiling Grid Sawdust Girl

Installing Flush Mount Llight Fixture Into Drop Ceiling Refinish Paint House Remodeling Decorating Construction Energy Use Kitchen Bathroom Bedroom Building Rooms City Data Forum

Drop Ceiling Installation How To Install A Homeserve Usa

How To Position Your Led Strip Lights

Drywall Suspended Grid Showroom Ceiling Systems How To Install Pictures Of Tips For Installing Drop Ceilings Strictly Racine Wisconsin

Diy Recessed Lighting Installation In A Drop Ceiling Tiles Part 3 Super Nova Adventures

5 Drop Ceiling Lighting Ideas
Related Posts


