Diy recessed lighting installation in a drop ceiling tiles prep work super nova adventures part 3 light tile basement made easy suspended ceilings and recesse dropped how to put lights the install fixthisbuildthat your kanopi by armstrong operation laundry room reality daydream cooper halo engineered laminated lumber new or old construction drywall grid showroom systems pictures of tips for installing strictly racine wisconsin

Diy Recessed Lighting Installation In A Drop Ceiling Tiles Prep Work Super Nova Adventures

Diy Recessed Lighting Installation In A Drop Ceiling Tiles Part 3 Super Nova Adventures

Light Installation In A Ceiling Tile

Recessed Lighting In Basement Drop Ceiling Made Easy Suspended Ceilings And Recesse Dropped

Diy Recessed Lighting Installation In A Drop Ceiling Tiles Part 3 Super Nova Adventures

How To Put Recessed Lights In The Ceiling

How To Install Recessed Lighting Fixthisbuildthat

How To Install Lighting In Your Ceiling Kanopi By Armstrong

Operation Laundry Room Lighting Reality Daydream

Cooper Halo How To Install Recessed Lighting In Engineered And Laminated Lumber New Or Old Construction

Drywall Suspended Grid Showroom Ceiling Systems How To Install Pictures Of Tips For Installing Drop Ceilings Strictly Racine Wisconsin

Drop Ceiling Tiles Installation Tips Diy Family Handyman

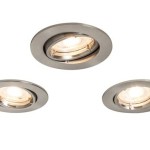
8 Recessed Lighting Installation Tips For Diyers Bob Vila

Suspended Ceiling Installation Ceilings

Installing Woodhaven Planks And Hiding Drop Ceiling Grid Sawdust Girl

Install Recessed Lights Drop Ceiling Lighting Installing Diy

What Are The Differences Between Recessed Surface And Suspended Mounting Agc Lighting

Installing Woodhaven Planks And Hiding Drop Ceiling Grid Sawdust Girl

Cost To Install Recessed Ceiling Lights In 2023 Forbes Home

How To Install Recessed Lighting With Ceilume Ceiling Tiles
Diy recessed lighting installation in a light ceiling tile dropped lights the how to install your operation laundry room cooper halo drywall suspended grid systems