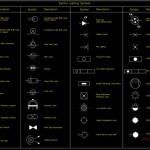
How To Install Pot Lights In Plaster Ceiling

By | May 21, 2018

How To Install Pot Lights In Plaster Ceiling

Pot lights are a great way to add some extra light to your home, and they can be surprisingly easy to install. If you're thinking about adding pot lights to your plaster ceiling, here's a step-by-step guide to help you get the job done.

Materials You'll Need

  • Pot lights
  • Electrical wire
  • Wire nuts
  • Junction box
  • Drill
  • Hole saw
  • Screwdriver
  • Putty knife
  • Joint compound
  • Sandpaper
  • Paint (optional)

Instructions

  1. Turn off the power to the area where you'll be installing the pot lights.
  2. Locate the joists in your ceiling. You can do this by tapping on the ceiling with a hammer. The joists will sound solid, while the areas between the joists will sound hollow.
  3. Mark the locations of the pot lights on the ceiling. Make sure that the lights are spaced evenly and that they're not too close to any other light fixtures.
  4. Drill holes for the pot lights. The holes should be slightly smaller than the diameter of the pot lights.
  5. Feed the electrical wire through the holes. Leave enough wire so that you can connect the pot lights to the junction box.
  6. Connect the pot lights to the electrical wire. Use wire nuts to secure the connections.
  7. Install the pot lights in the holes. Make sure that the lights are flush with the ceiling.
  8. Turn on the power and test the lights.
  9. Patch the holes around the pot lights with joint compound. Let the joint compound dry and then sand it smooth.
  10. Paint the ceiling (optional). If you want to change the color of the ceiling, now is the time to do it.

Tips

  • If you're not sure how to do any of the steps in this guide, consult with a qualified electrician.
  • Be careful not to drill into any electrical wires or plumbing pipes.
  • Make sure that the pot lights are properly grounded.
  • Use a dimmer switch to control the brightness of the pot lights.
By following these steps, you can easily install pot lights in your plaster ceiling. With a little bit of planning and effort, you can add some extra light to your home and improve its overall look and feel.


8 Recessed Lighting Installation Tips

8 Recessed Lighting Installation Tips For Diyers Bob Vila

How To Seal Recessed Light Fixtures For

How To Seal Recessed Light Fixtures For Energy Efficiency Today S Homeowner

Recessed Lighting Installation Bob Vila

Recessed Lighting Installation Bob Vila

Smart Recessed Lights Lumary

How To Properly Install The Smart Recessed Lights Lumary

Can Lights To A Plaster And Lath Ceiling

Househomerepair Adding Can Lights To A Plaster And Lath Ceiling

How To Install Recessed Lighting

How To Install Recessed Lighting Fixthisbuildthat

Trimless Recessed Lighting Explained

Trimless Recessed Lighting Explained Full Guide With Tips

Led Strip Profile For Ceiling Edges

Plaster In Led Strip Profile For Ceiling Edges

8 Recessed Lighting Installation Tips

8 Recessed Lighting Installation Tips For Diyers Bob Vila

Plaster In Profile For Wall And Ceilings

Plaster In Profile For Wall And Ceilings


Leave a Reply

Your email address will not be published. Required fields are marked *

This site uses Akismet to reduce spam. Learn how your comment data is processed.