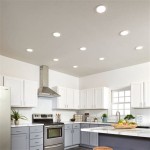
How to Effortlessly Install Recessed Lights in Thick Ceilings: A Comprehensive Guide
Transforming your thick ceiling into a radiant showcase with recessed lighting is a rewarding endeavor. However, it requires meticulous planning and careful execution. This comprehensive guide will empower you with the knowledge and techniques to execute this project seamlessly.
1. Gathering Essential Tools and Materials
Before embarking on your lighting journey, ensure you have the following tools and materials:
- Recessed light fixtures
- Hole saw or paddle bit
- Drill li>Electrical wire
- Wire nuts
- Screwdriver
- Insulation
- Trim
2. Planning the Placement
Properly positioning your recessed lights is crucial for optimal illumination. Determine the desired effect and spacing before drilling any holes. Mark the locations on the ceiling using a pencil and measuring tape.
3. Creating the Holes
Using the hole saw or paddle bit, carefully create holes for the recessed light fixtures. Ensure the holes are slightly larger than the diameter of the fixtures to allow for wiring and insulation.
4. Wiring the Lights
Connect the electrical wires to the recessed light fixtures and secure them with wire nuts. Ensure the connections are tight and insulated using electrical tape.
5. Insulating Around the Fixtures
To prevent heat buildup and air leaks, carefully pack insulation around the recessed light fixtures. This will help maintain the integrity of the ceiling and reduce energy consumption.
6. Installing the Fixtures
Slide the recessed light fixtures into the holes and secure them using the provided brackets or screws. Ensure the fixtures are level and aligned with the ceiling.
7. Trimming the Openings
Conceal the edges of the holes with decorative trim. This will enhance the aesthetics of the lighting and provide a finished look.
8. Connecting to Power
Connect the electrical wires from the recessed lights to the power source using wire nuts. Ensure all connections are secure and insulated.
9. Turning on the Lights
Finally, flip the switch to illuminate your newly installed recessed lights. Revel in the enhanced ambiance and functionality they bring to your space.
Additional Considerations
- Always adhere to local building codes and electrical safety regulations.
- Use energy-efficient LED bulbs to reduce energy consumption.
- Consider using a dimmer switch to adjust the lighting intensity.
- If you encounter any difficulties or safety concerns, do not hesitate to seek professional assistance from a licensed electrician.

How To Build A Soffit Box With Recessed Lighting Diy

How To Seal Recessed Light Fixtures For Energy Efficiency Today S Homeowner

Anatomy Of Recessed Lighting

Recessed Lighting Help How Many And Where R Diy

8 Recessed Lighting Installation Tips For Diyers Bob Vila

Halo 6 In Selectable Cct 2700k To 5000k Integrated Led White Recessed Light Sloped Ceiling Trim Direct Mount Module Rls6159fs1ewhdmr The Home Depot

Diy Beadboard Ceiling Tutorial Easy And Inexpensive Custom Treatment

Choosing The Best Led Recessed Lighting What You Should Know Blog

Halo 6 In Selectable Cct 2700k To 5000k Integrated Led White Recessed Light Sloped Ceiling Trim Direct Mount Module Rls6159fs1ewhdmr The Home Depot

Easy Ways To Replace An Led Recessed Light Bulb 13 Steps
Related Posts